
Electronic Instructions for Use
Patient mobile application
General information
This document contains information about the proper and safe use of the software and concerns the Aether Digital Platform Mobile 1.16.0 application (M‑ADP).
- –Read this document carefully before installing the software.
- –Keep this document available for reference. A paper copy is available free of charge on request.
- –For any questions about the product, use the contact form at www.aetherbiomedical.com.
- –The Aether Digital Platform Mobile must be accessed via iOS 15.1 or higher, or Android 8.0 or higher, and requires Bluetooth and an internet connection.
Intended use
The Aether Digital Platform Mobile (M‑ADP) is intended to monitor the usage of the device and access settings of the Zeus prosthetic hand (a class I device), and to remotely contact the clinician. The software is designed exclusively for the Zeus hand and requires Bluetooth and a stable internet connection.
Warning Avoid moving the hand during connection to the device, during installation or restoring of a new configuration, and during configuration changes in a session with a clinician.
Installation and first launch
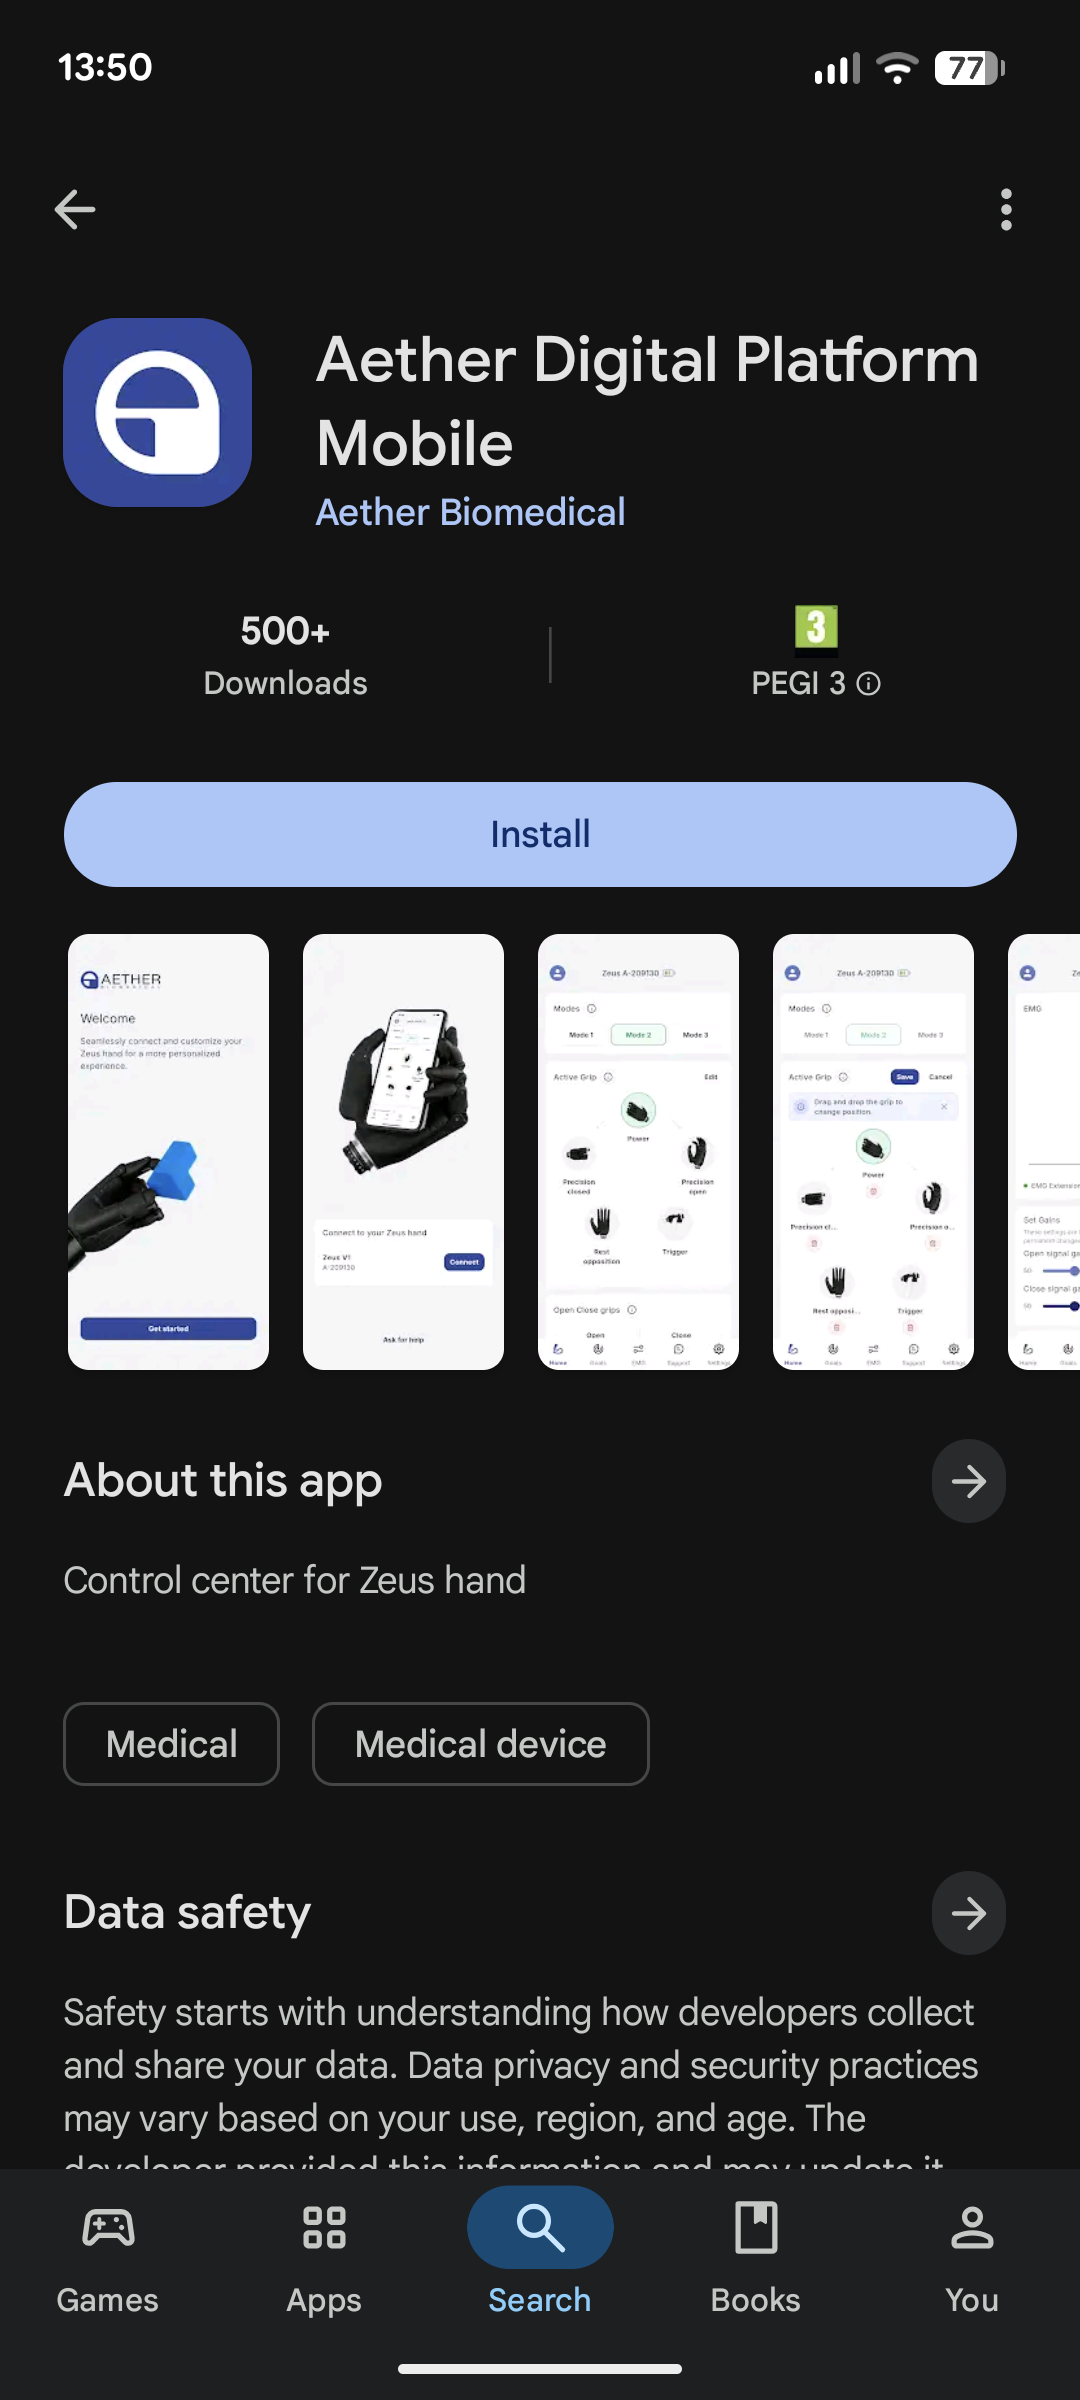
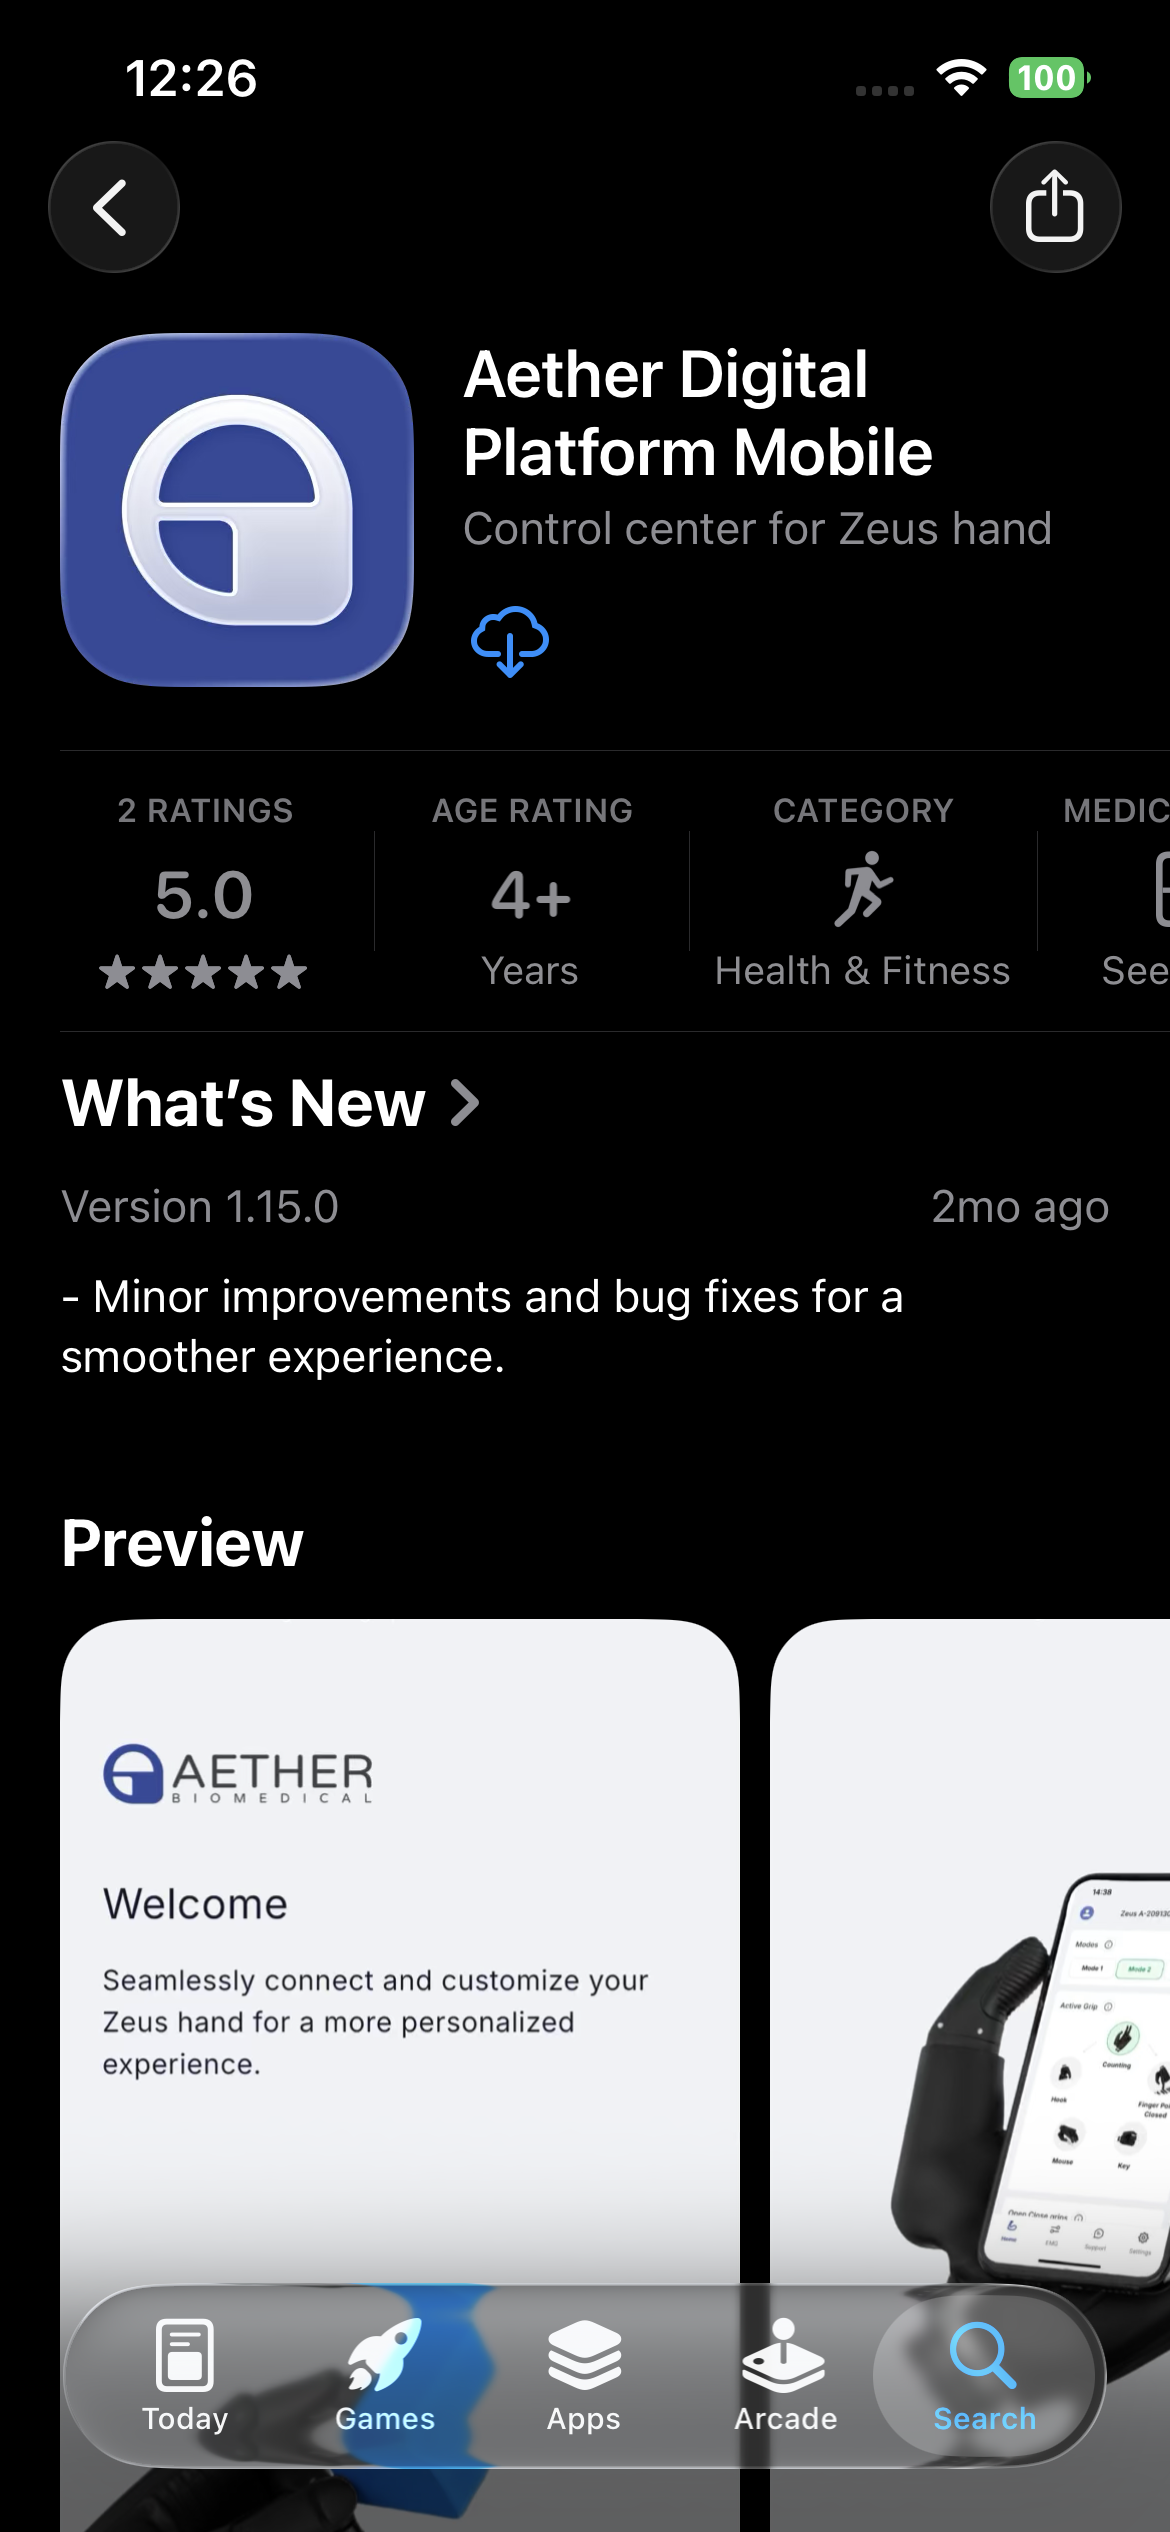
The Aether Digital Platform Mobile can be downloaded and installed from Google Play and the Apple App Store. Search for the application by name, or use the link provided by your clinic.
3.1 Logging in
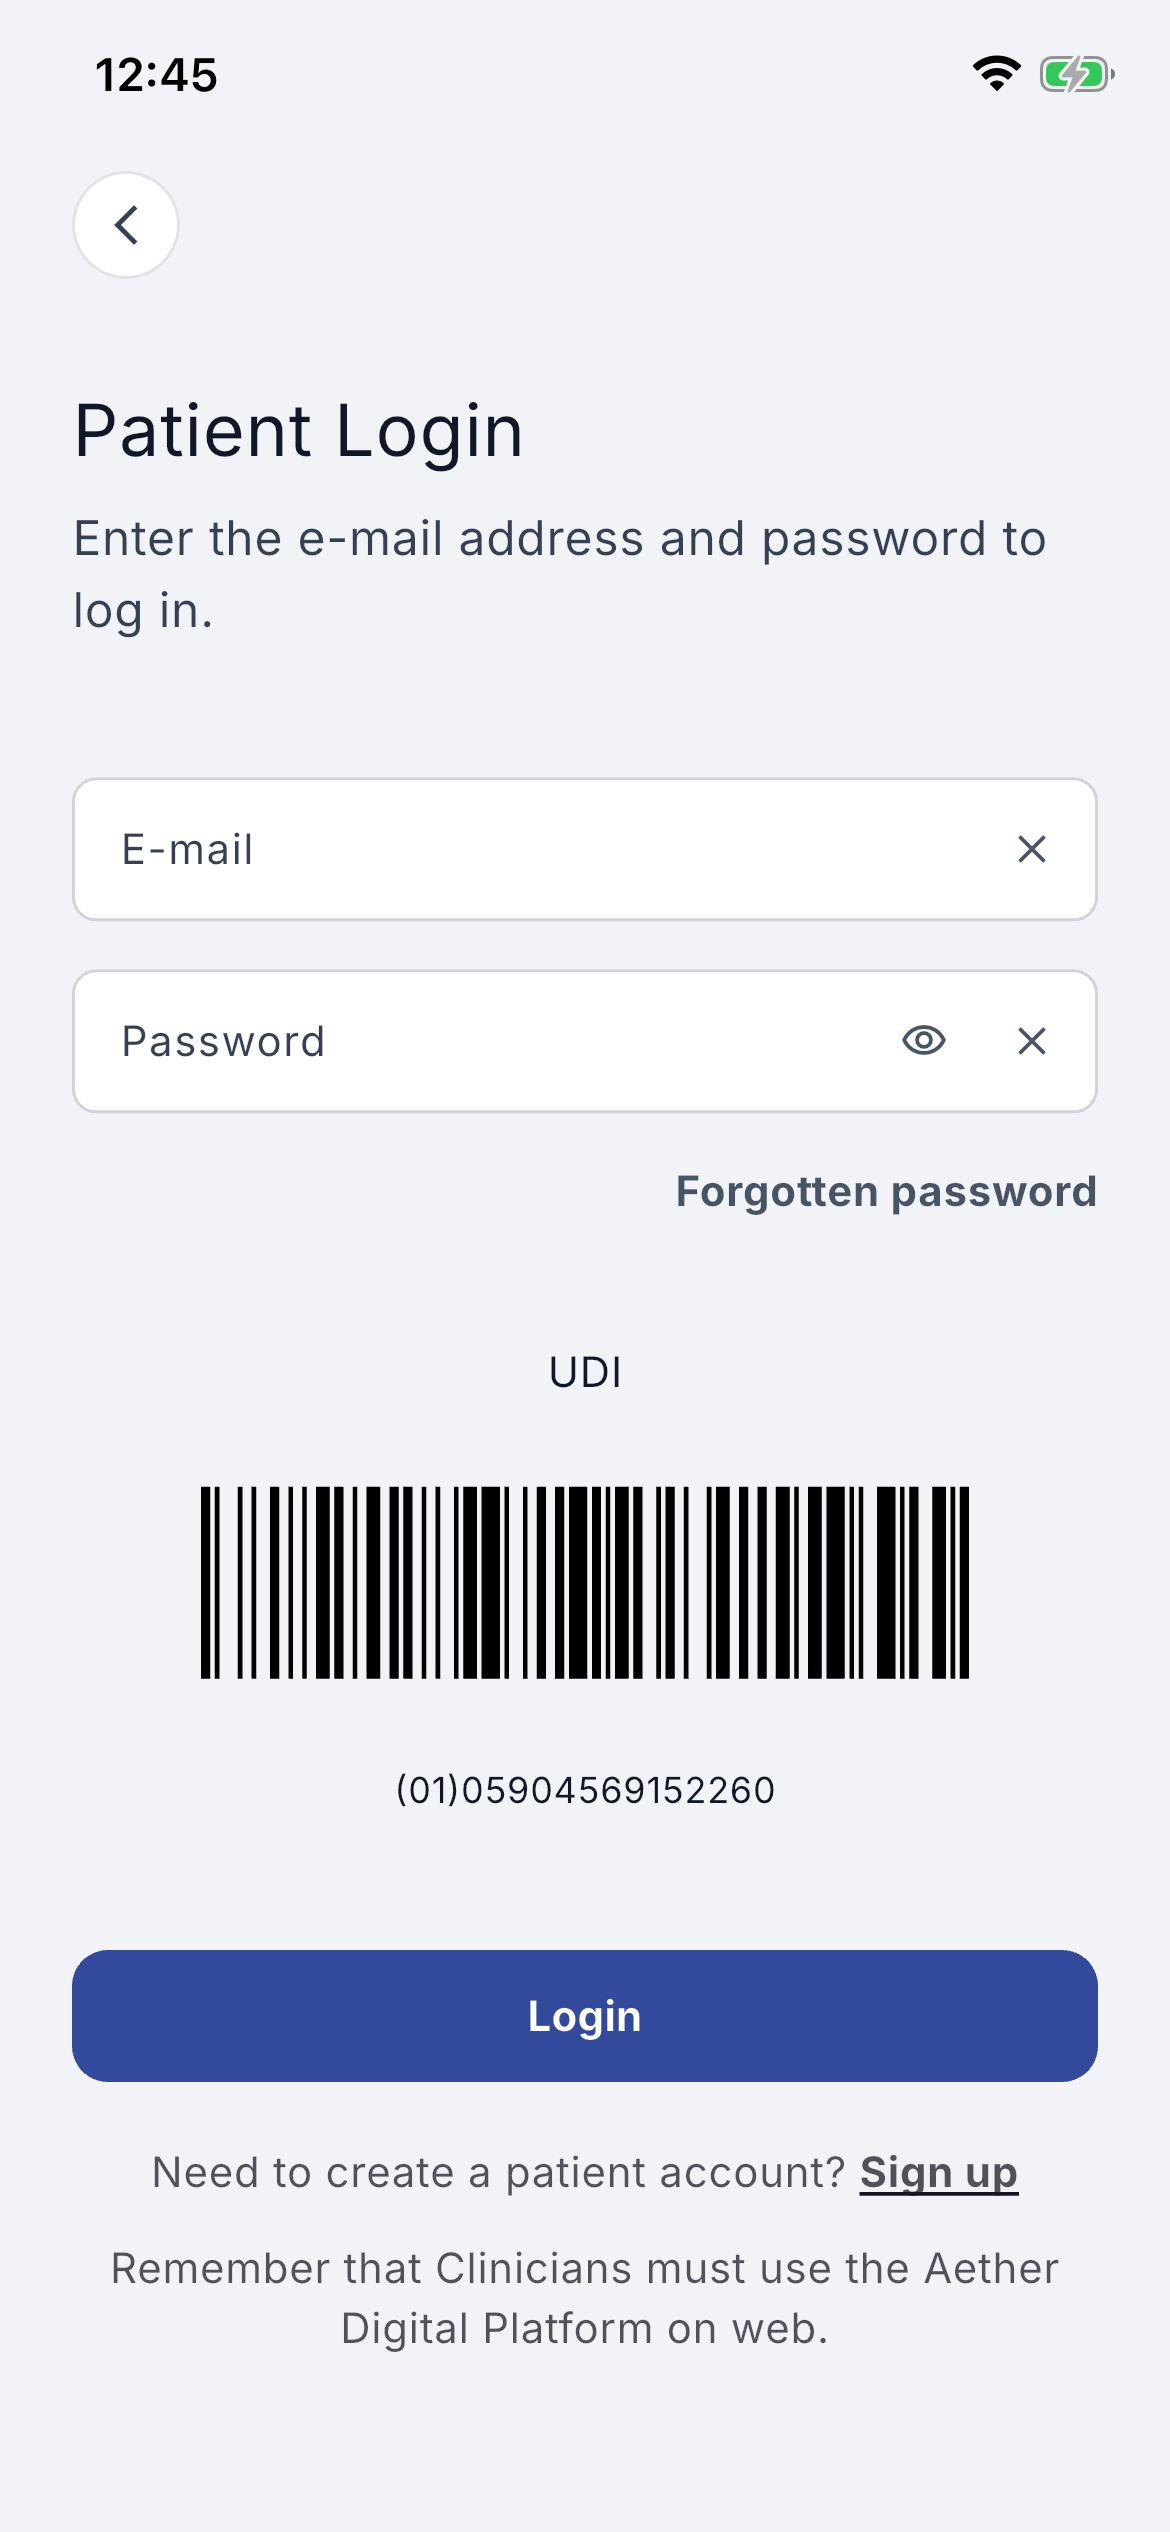
- –Log in with the email and password provided by your clinician. Terms of Use and the Privacy Policy must be accepted to proceed.
- –To reset your password, enter your email address; instructions will be sent to that address. If you do not receive the email within a few minutes, check your spam folder.
- –You can create an account using the registration form behind the 'Sign up' link. After creating the account, your clinician must assign your device to your email address.
3.2 Allow necessary permissions
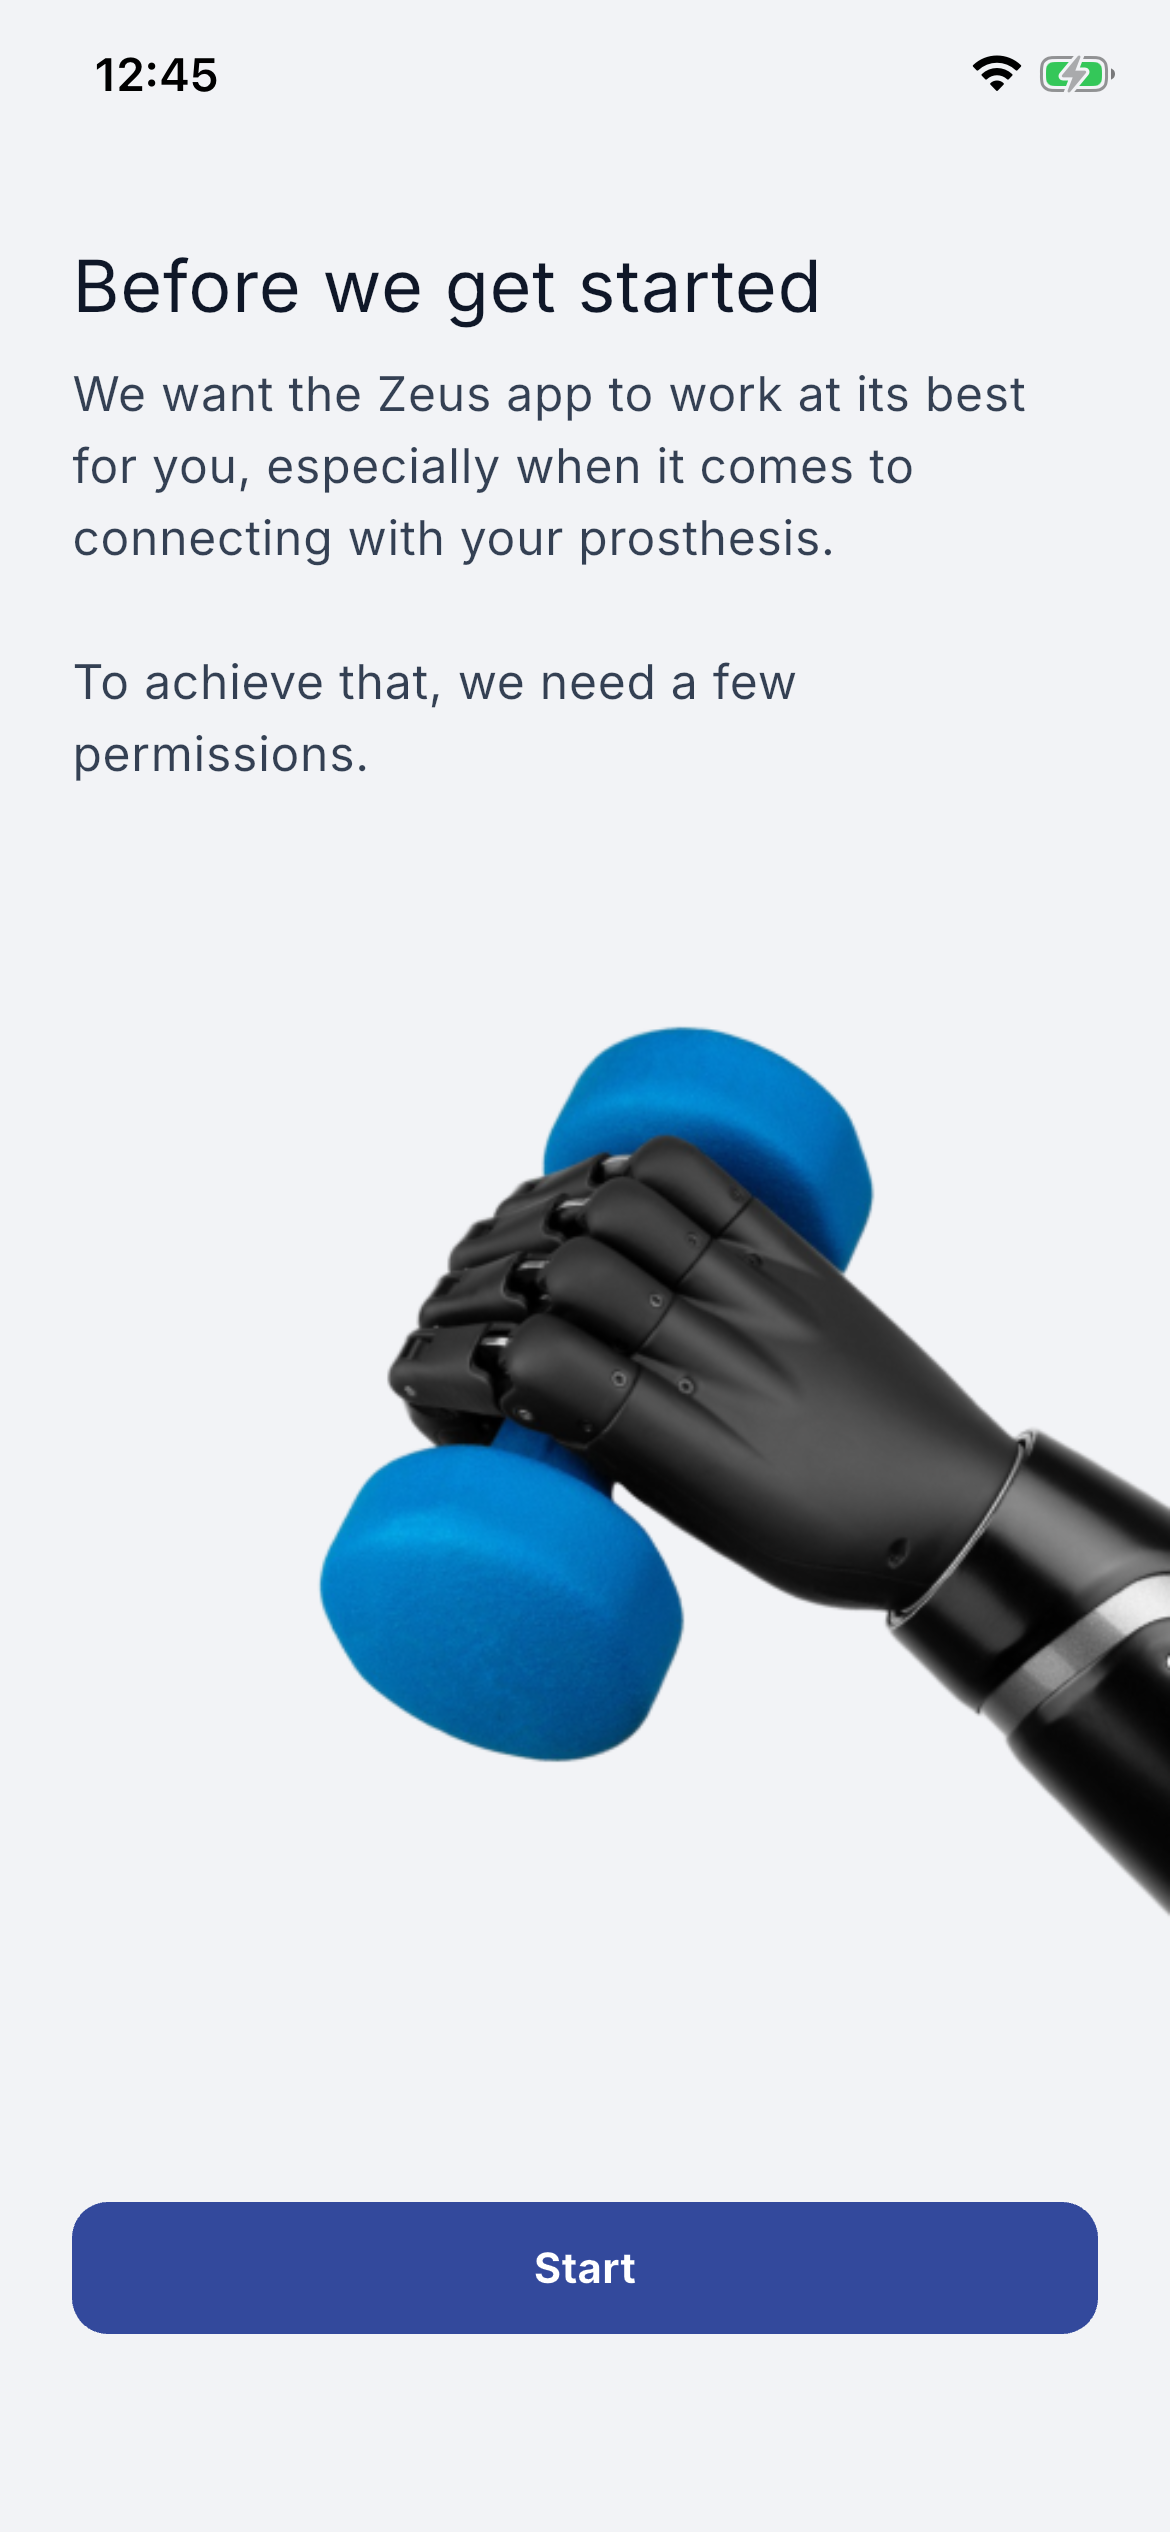
After the first login you will be asked to set certain preferences.
- -Biometric login (fingerprint or facial recognition) lets you access the app quickly without entering your login and password each time.
For the application to work properly, accept the required permissions shown on your phone screen:
- –On iOS: Background app refresh.
- –On Android: Display over apps; Battery optimisation.
- –On both platforms: Bluetooth; Push notifications (optional).
Once this is done you will see a 'Success!' screen with a 'Go to the application' bar.
3.3 Connect to your Zeus hand
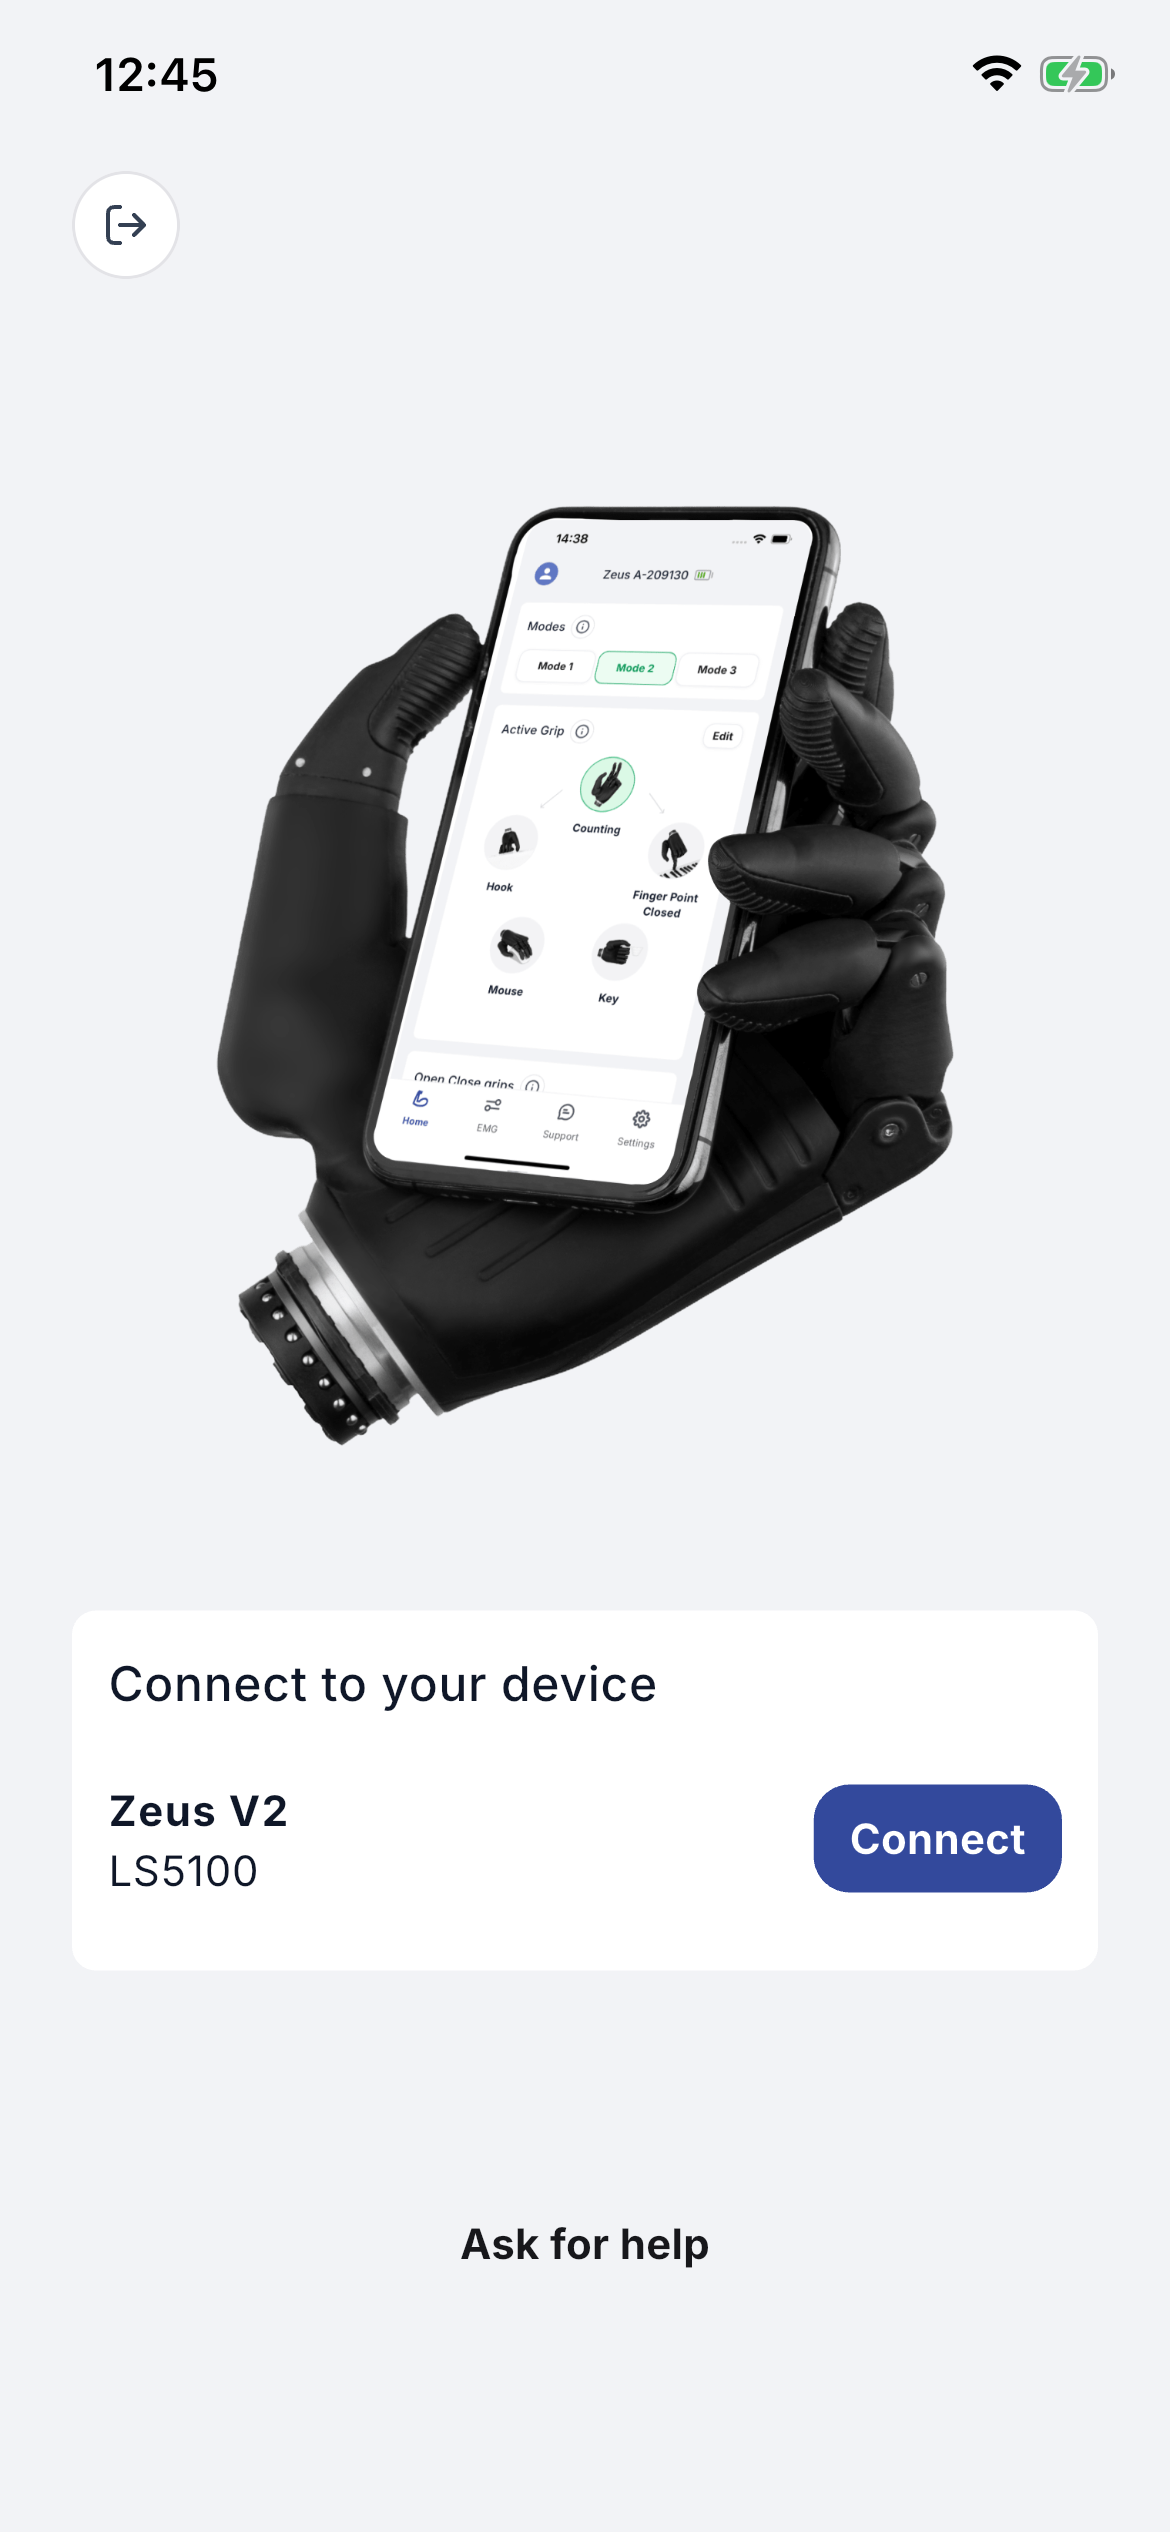
The app must connect to your prosthetic hand. Make sure the prosthesis is turned on and that Bluetooth (and location, for Android 11 and older) is enabled on your phone. After completing permissions you will see a list of devices assigned to your account. Tap 'Connect' to pair.
Note If your device does not appear, contact your clinician to confirm it has been assigned to your patient account.
3.4 Update notification when a new app is published
When a new version of the application is released you will see a message after opening it. An update is required for proper operation. Follow the on-screen instructions.
Home
4.1 Sending Device Usage Monitoring data (DUM)
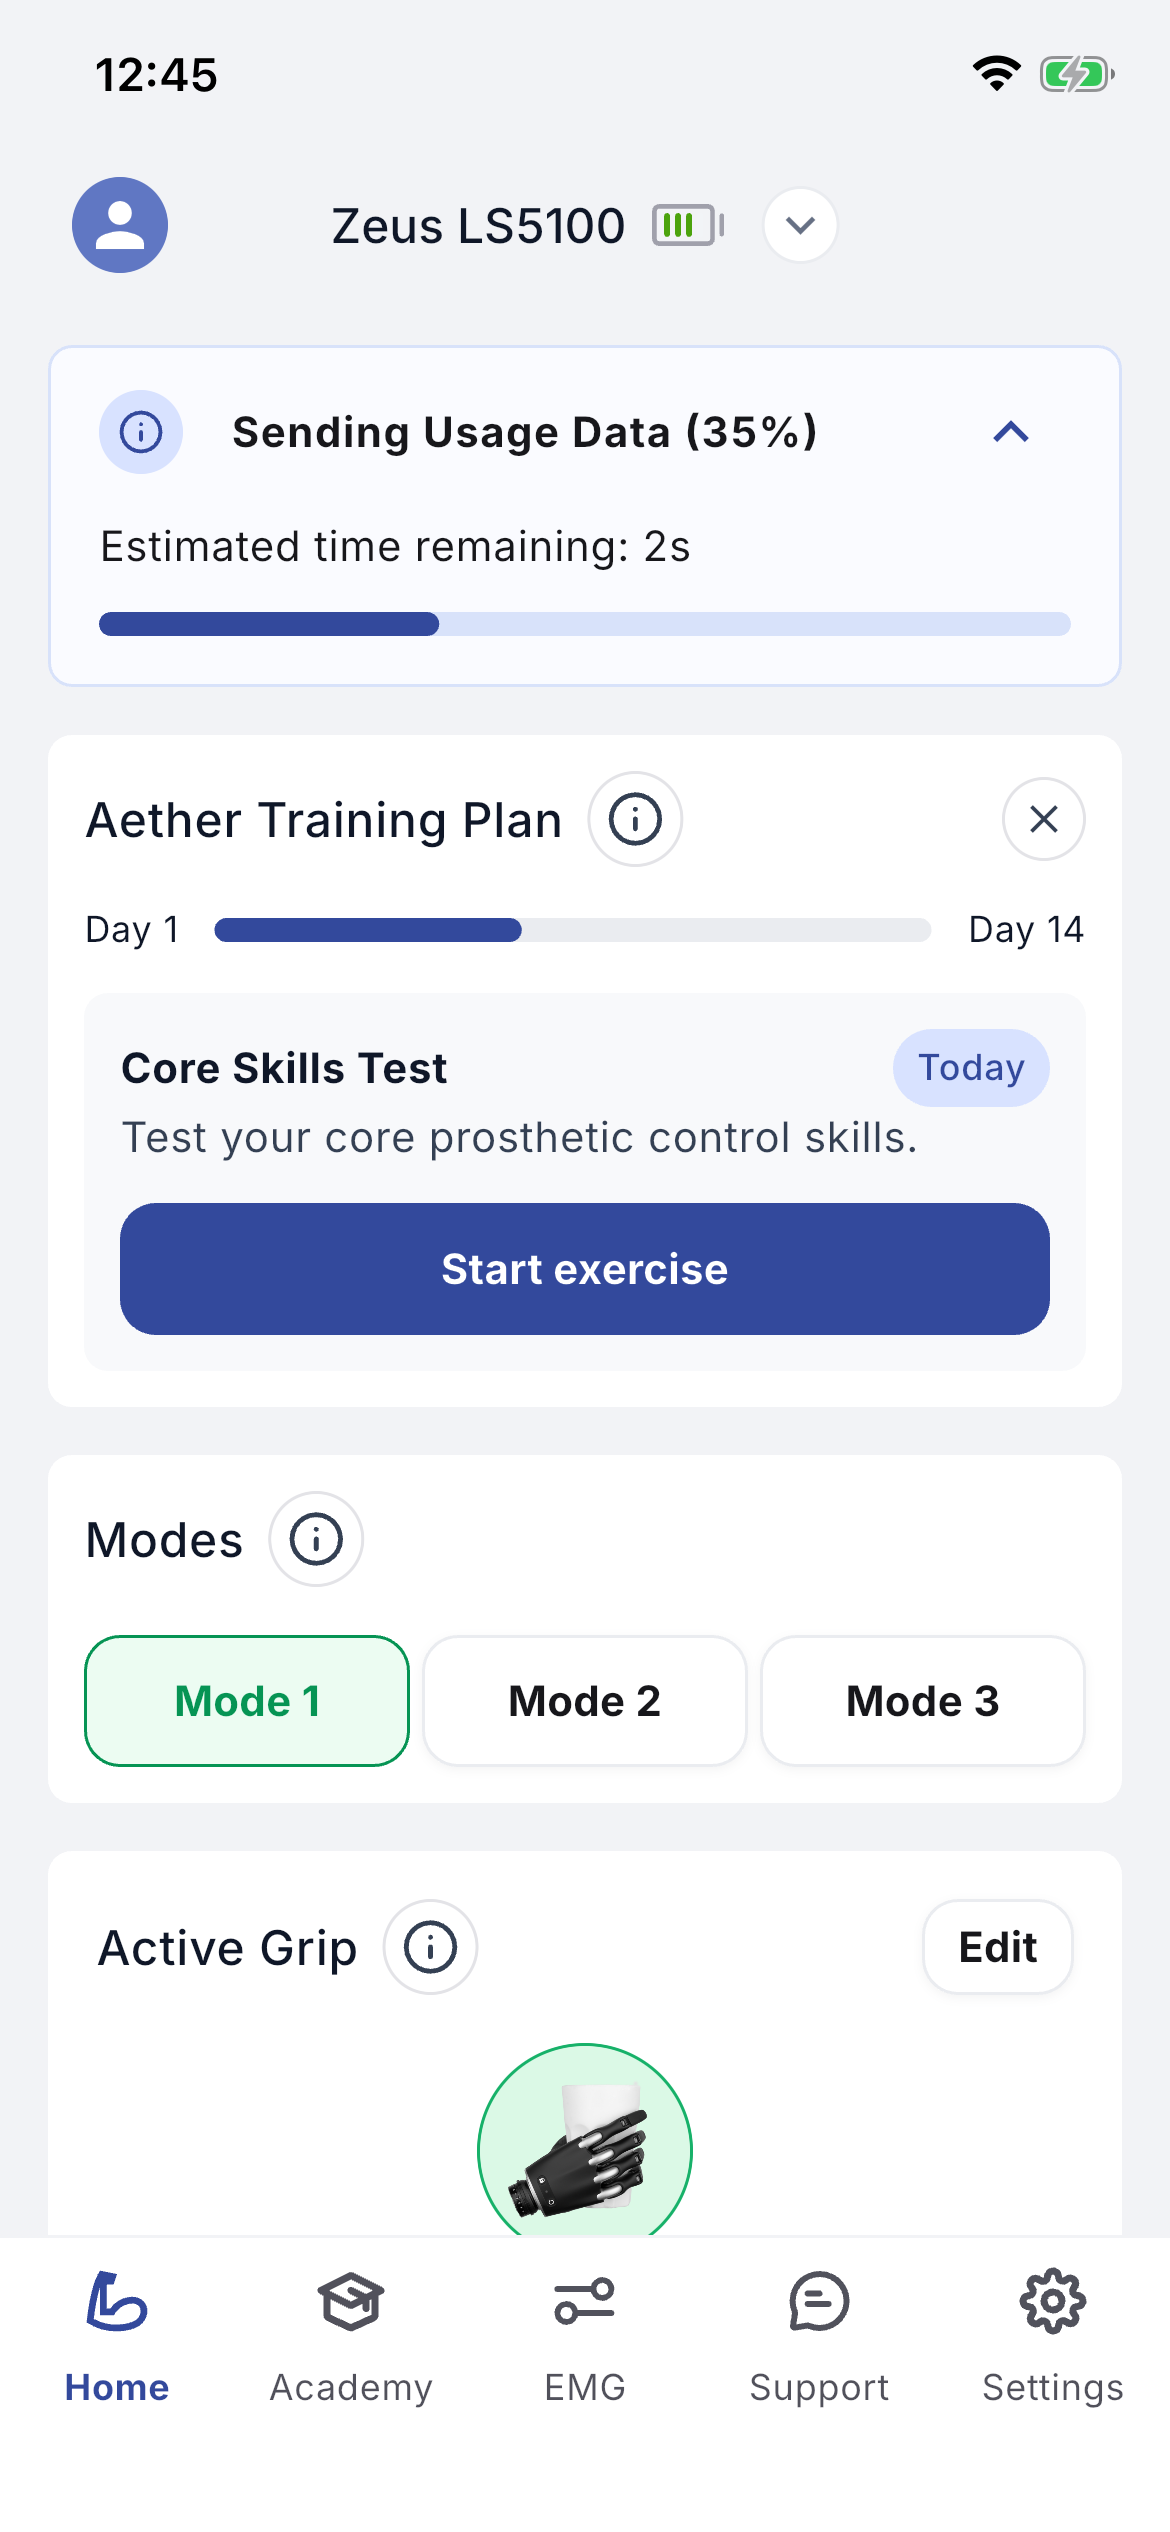
When the app first connects to the Zeus hand it retrieves usage statistics from the hand and sends them to the platform in the background.
4.2 Modes
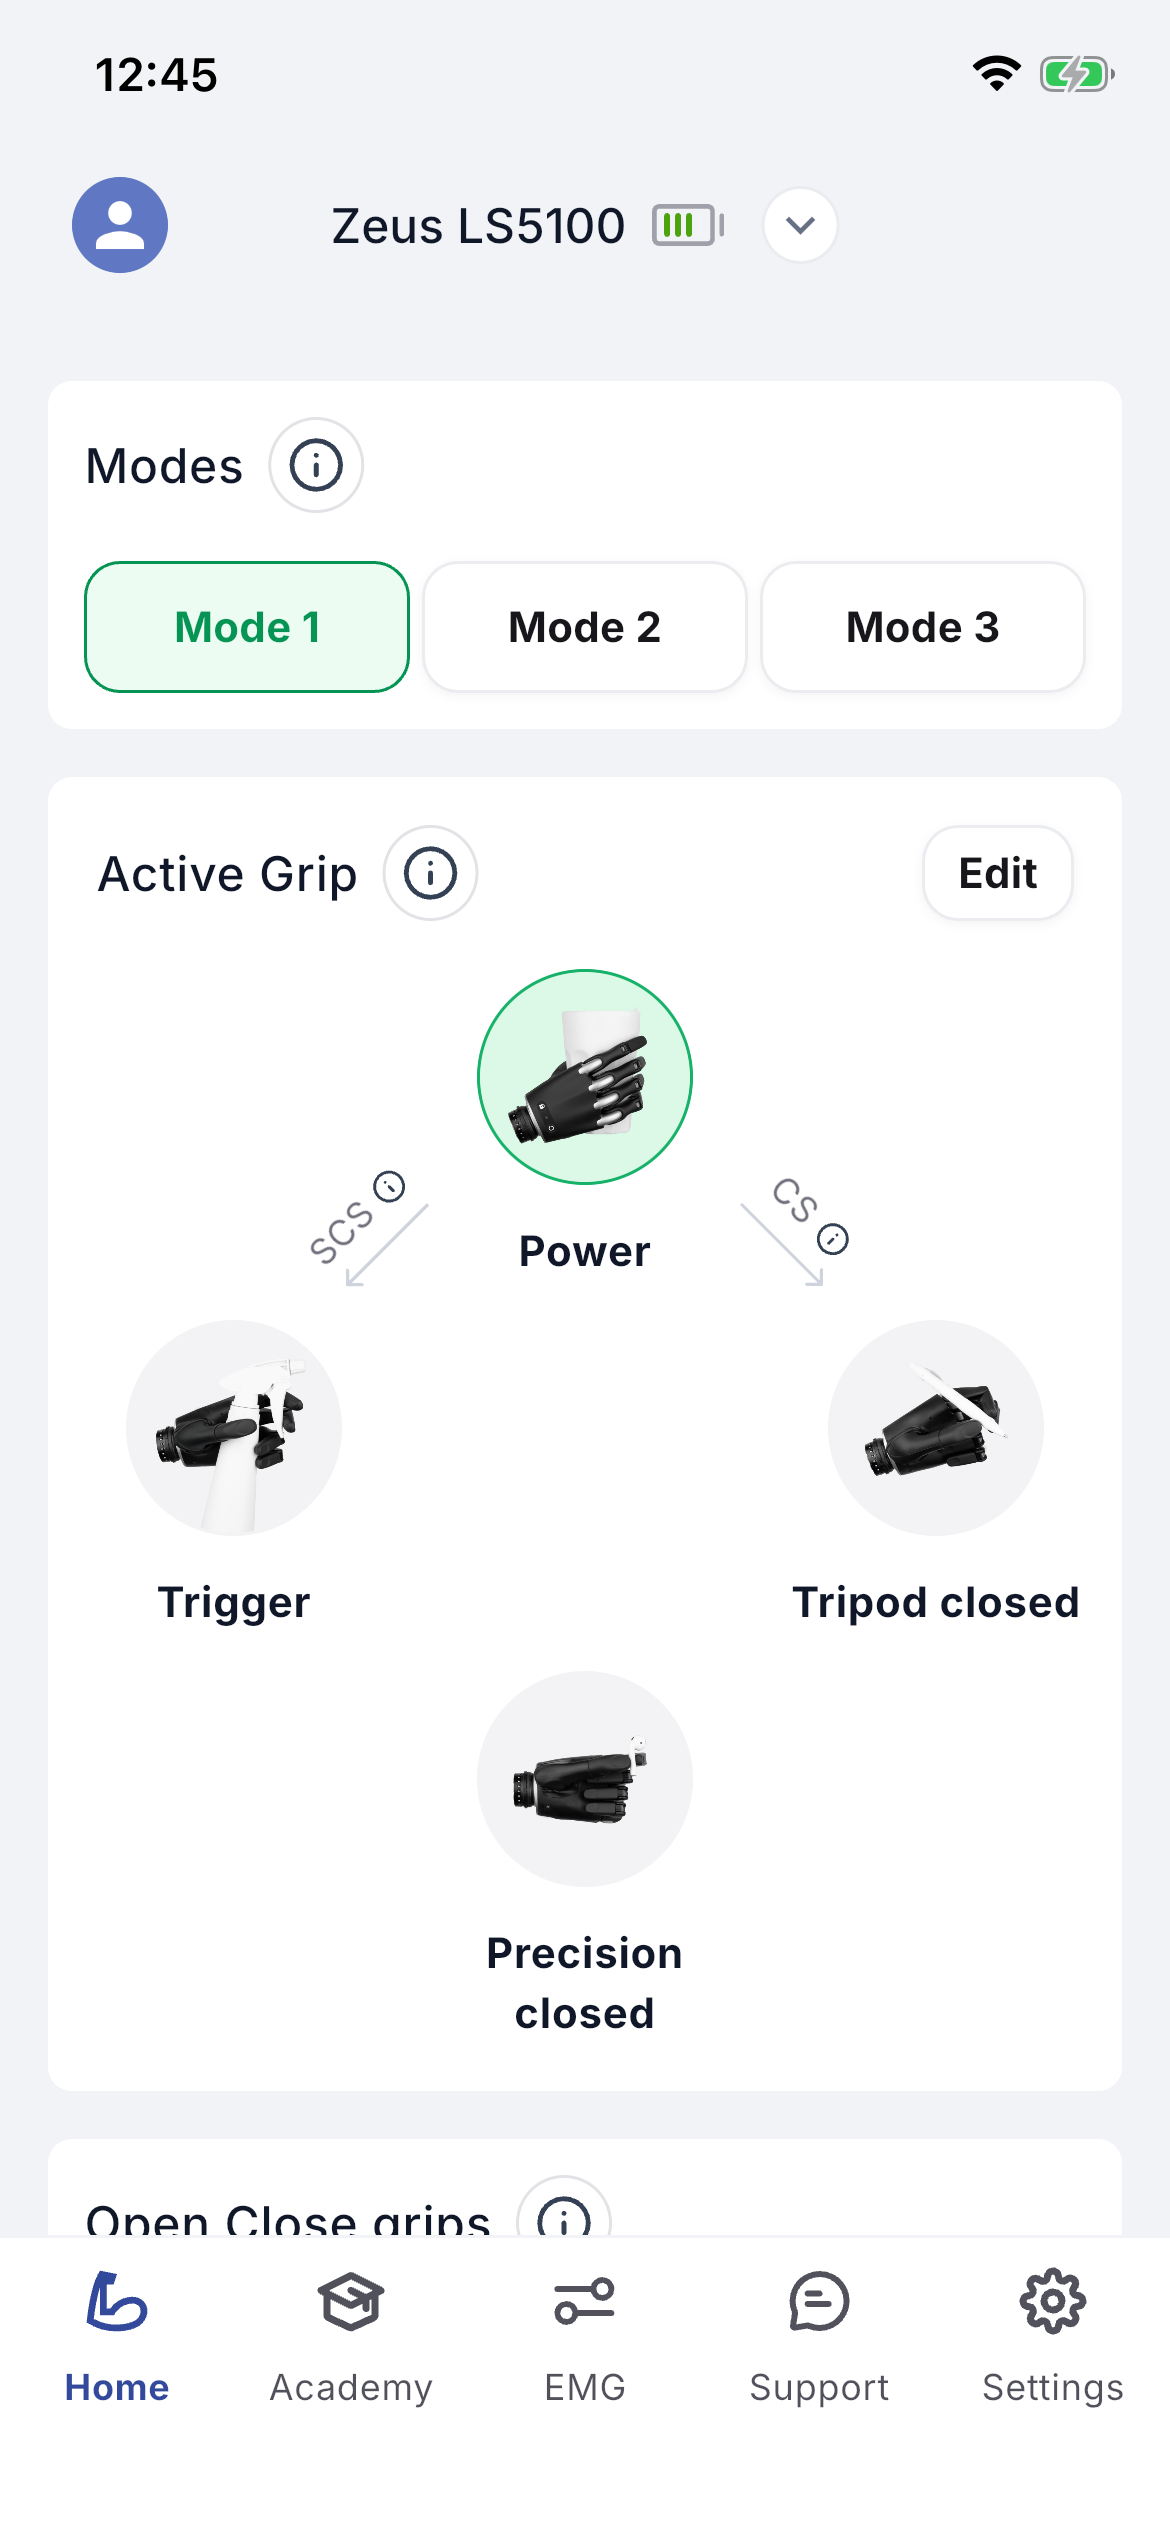
Modes are different configurations saved in the device. Switch between them using the buttons with the corresponding mode names in the upper-centre of the screen. Each mode stores: grips order; EMG settings; speed control strategy; grip switching mode; co-contraction, pulse and hold-open timings; Soft-Grip settings; and input sites. Grip finger positions are common to all modes and are not stored per mode.
4.3 Grips
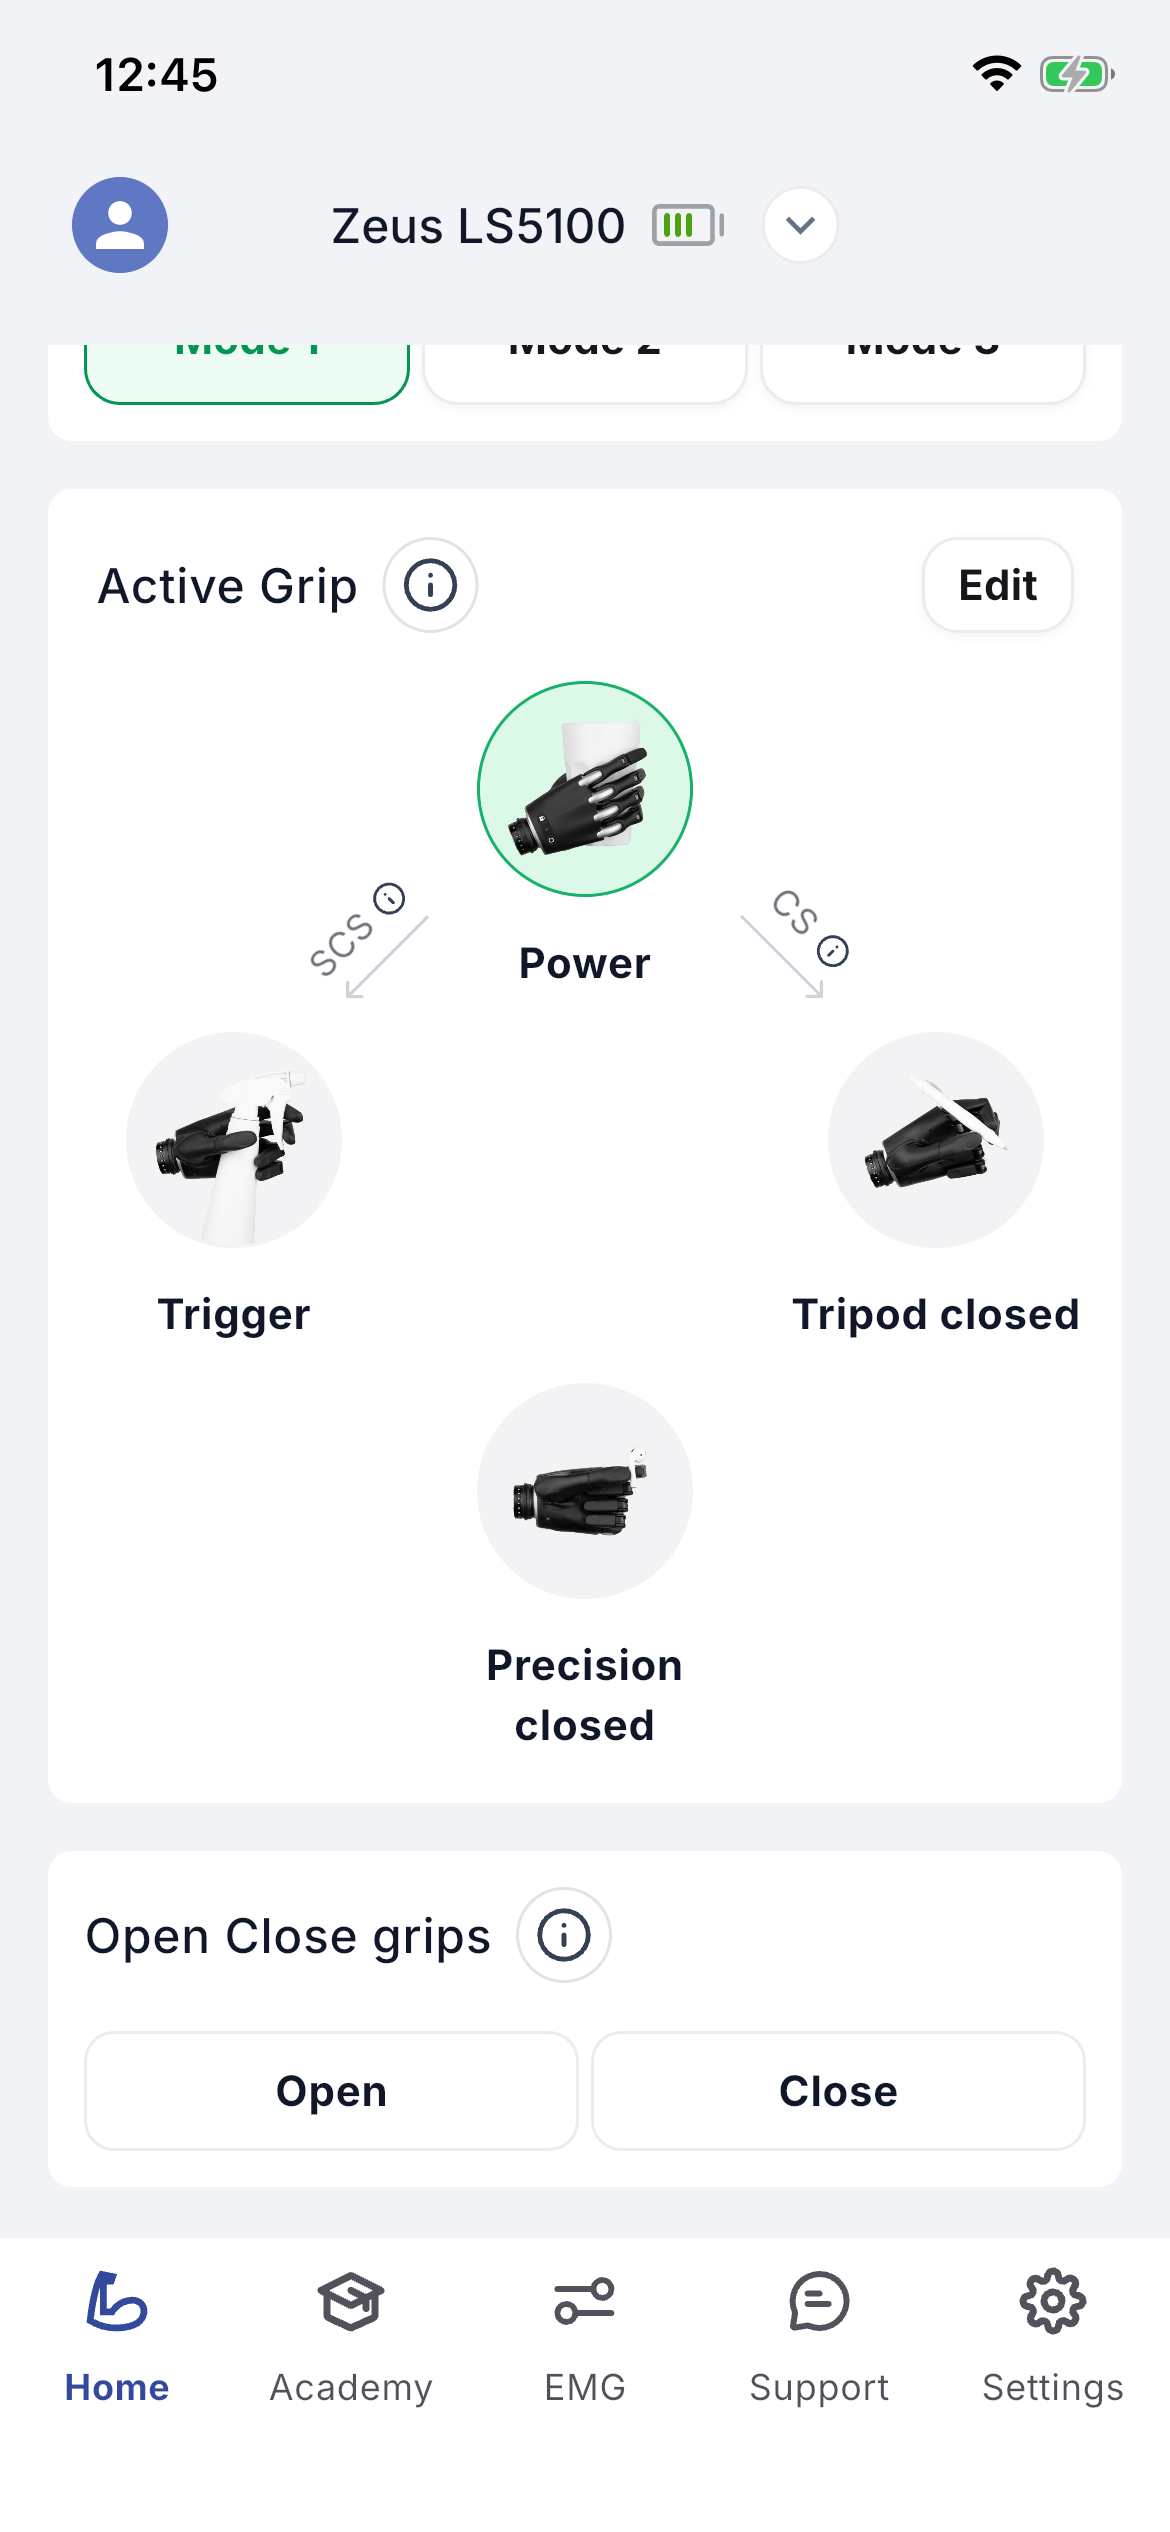
From this screen you can review the current grip settings and change their order. The active grip is highlighted in green.
4.4 Open and close the hand
From the phone you can trigger the hand action: 'Open' opens the hand and 'Close' closes it.
EMG
5.1 Check EMG signals
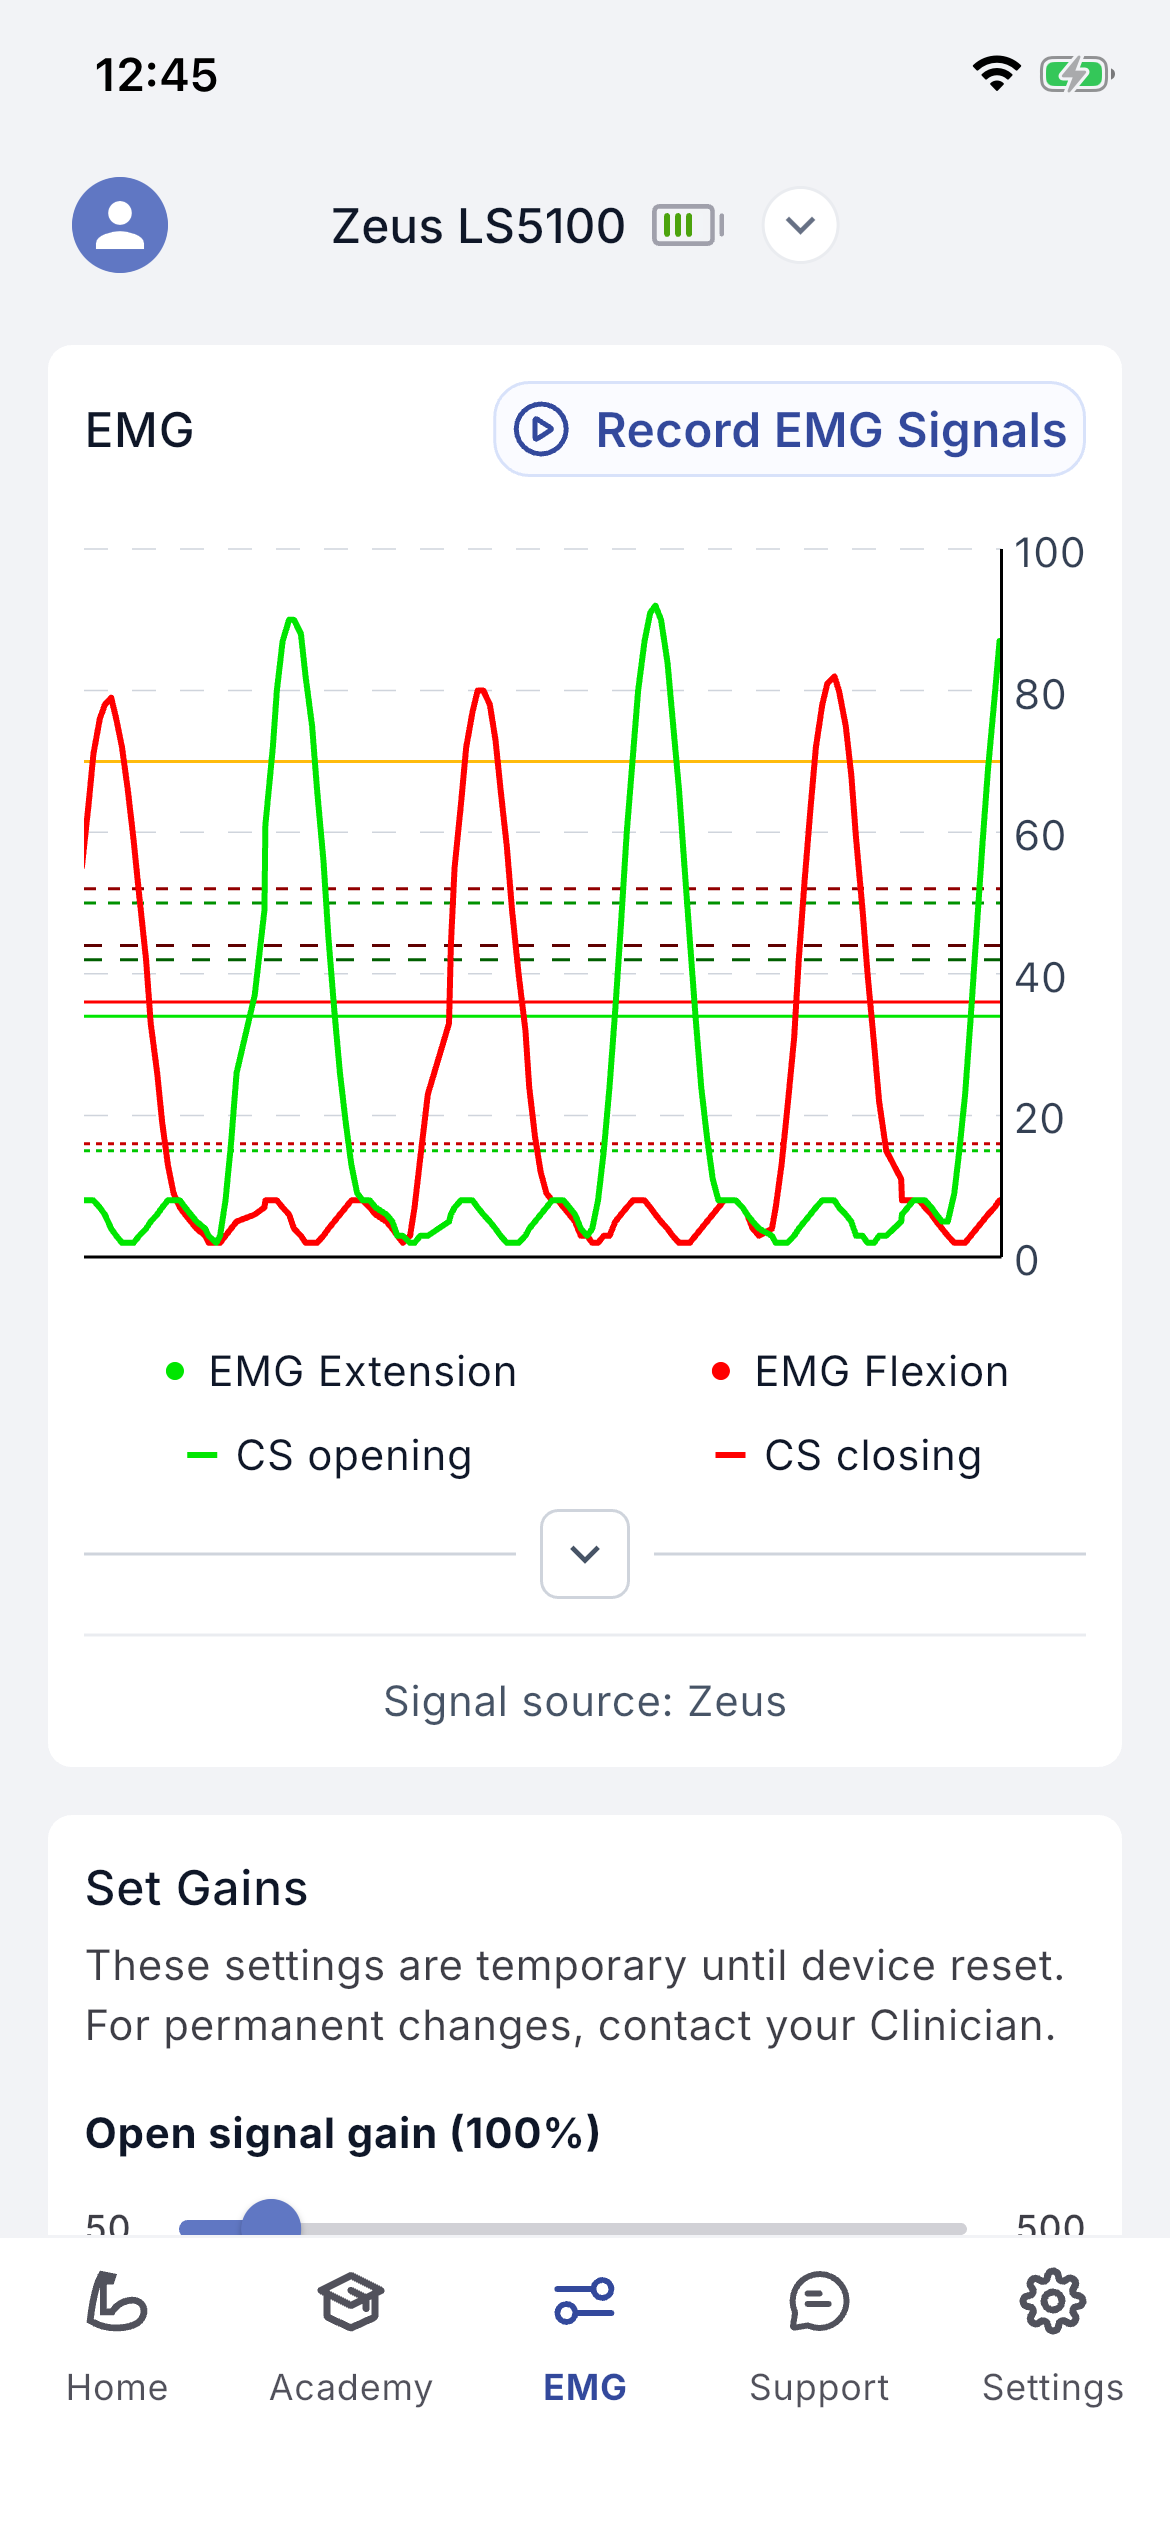
The EMG screen shows a real-time graph of the signals from your muscles. The scale on the right shows signal strength. Two coloured lines are shown: opening EMG (green) and closing EMG (red).
Set Gains lets you adjust the boost of the EMG gains to experiment with ease of control. These gains are not saved when the hand is turned off and on. To save boosted gains permanently, contact your clinician.
Sliders turn visual cues on and off for various thresholds:
- –Change signal - CS opening (green) and CS closing (red): the minimum threshold for recognising a signal as opening or closing.
- –Speed 1, 2, 3 - Opening (green dotted and dashed lines) and Closing (dark-red dotted and dashed lines): the minimum thresholds for each speed. Speeds 2 and 3 are used only with the Proportional speed control strategy.
- –Full power - orange line: the minimum threshold for closing at full power, used for Soft-Grip.
Warning Thresholds can be adjusted by the clinician only.
5.2 Record EMG signals
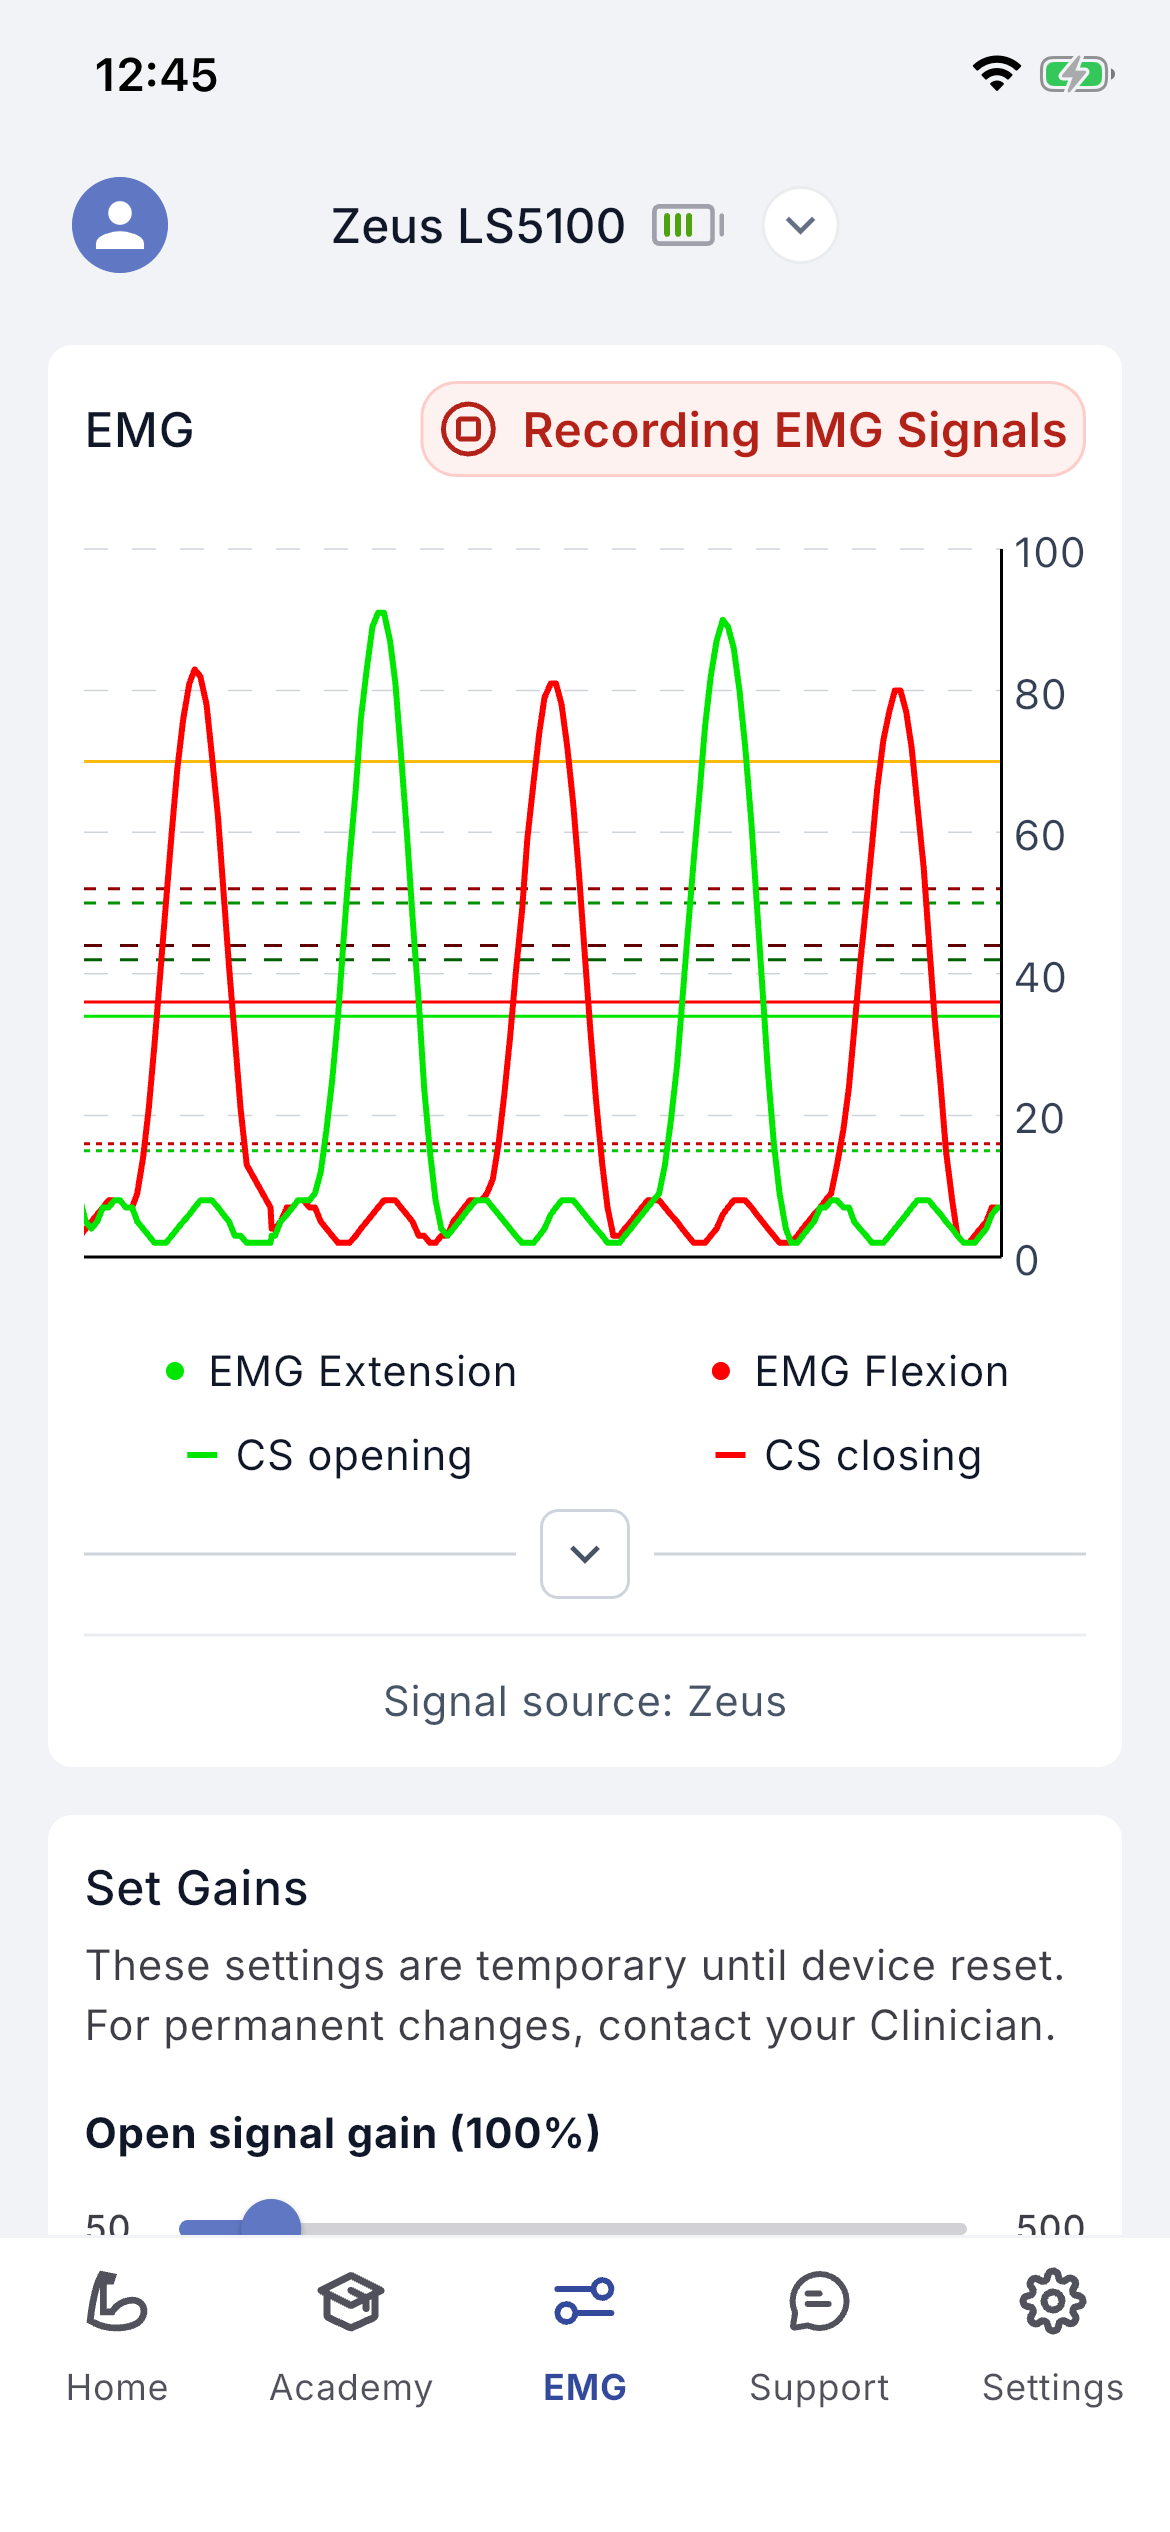
When this screen is active the EMG signals are shown on the graph and recorded. To finish, tap 'Stop recording EMG'; you are redirected to the 'Ask for support' screen with your data attached. To attach recorded signals to a support request, tap 'Record EMG signals' first.
Support
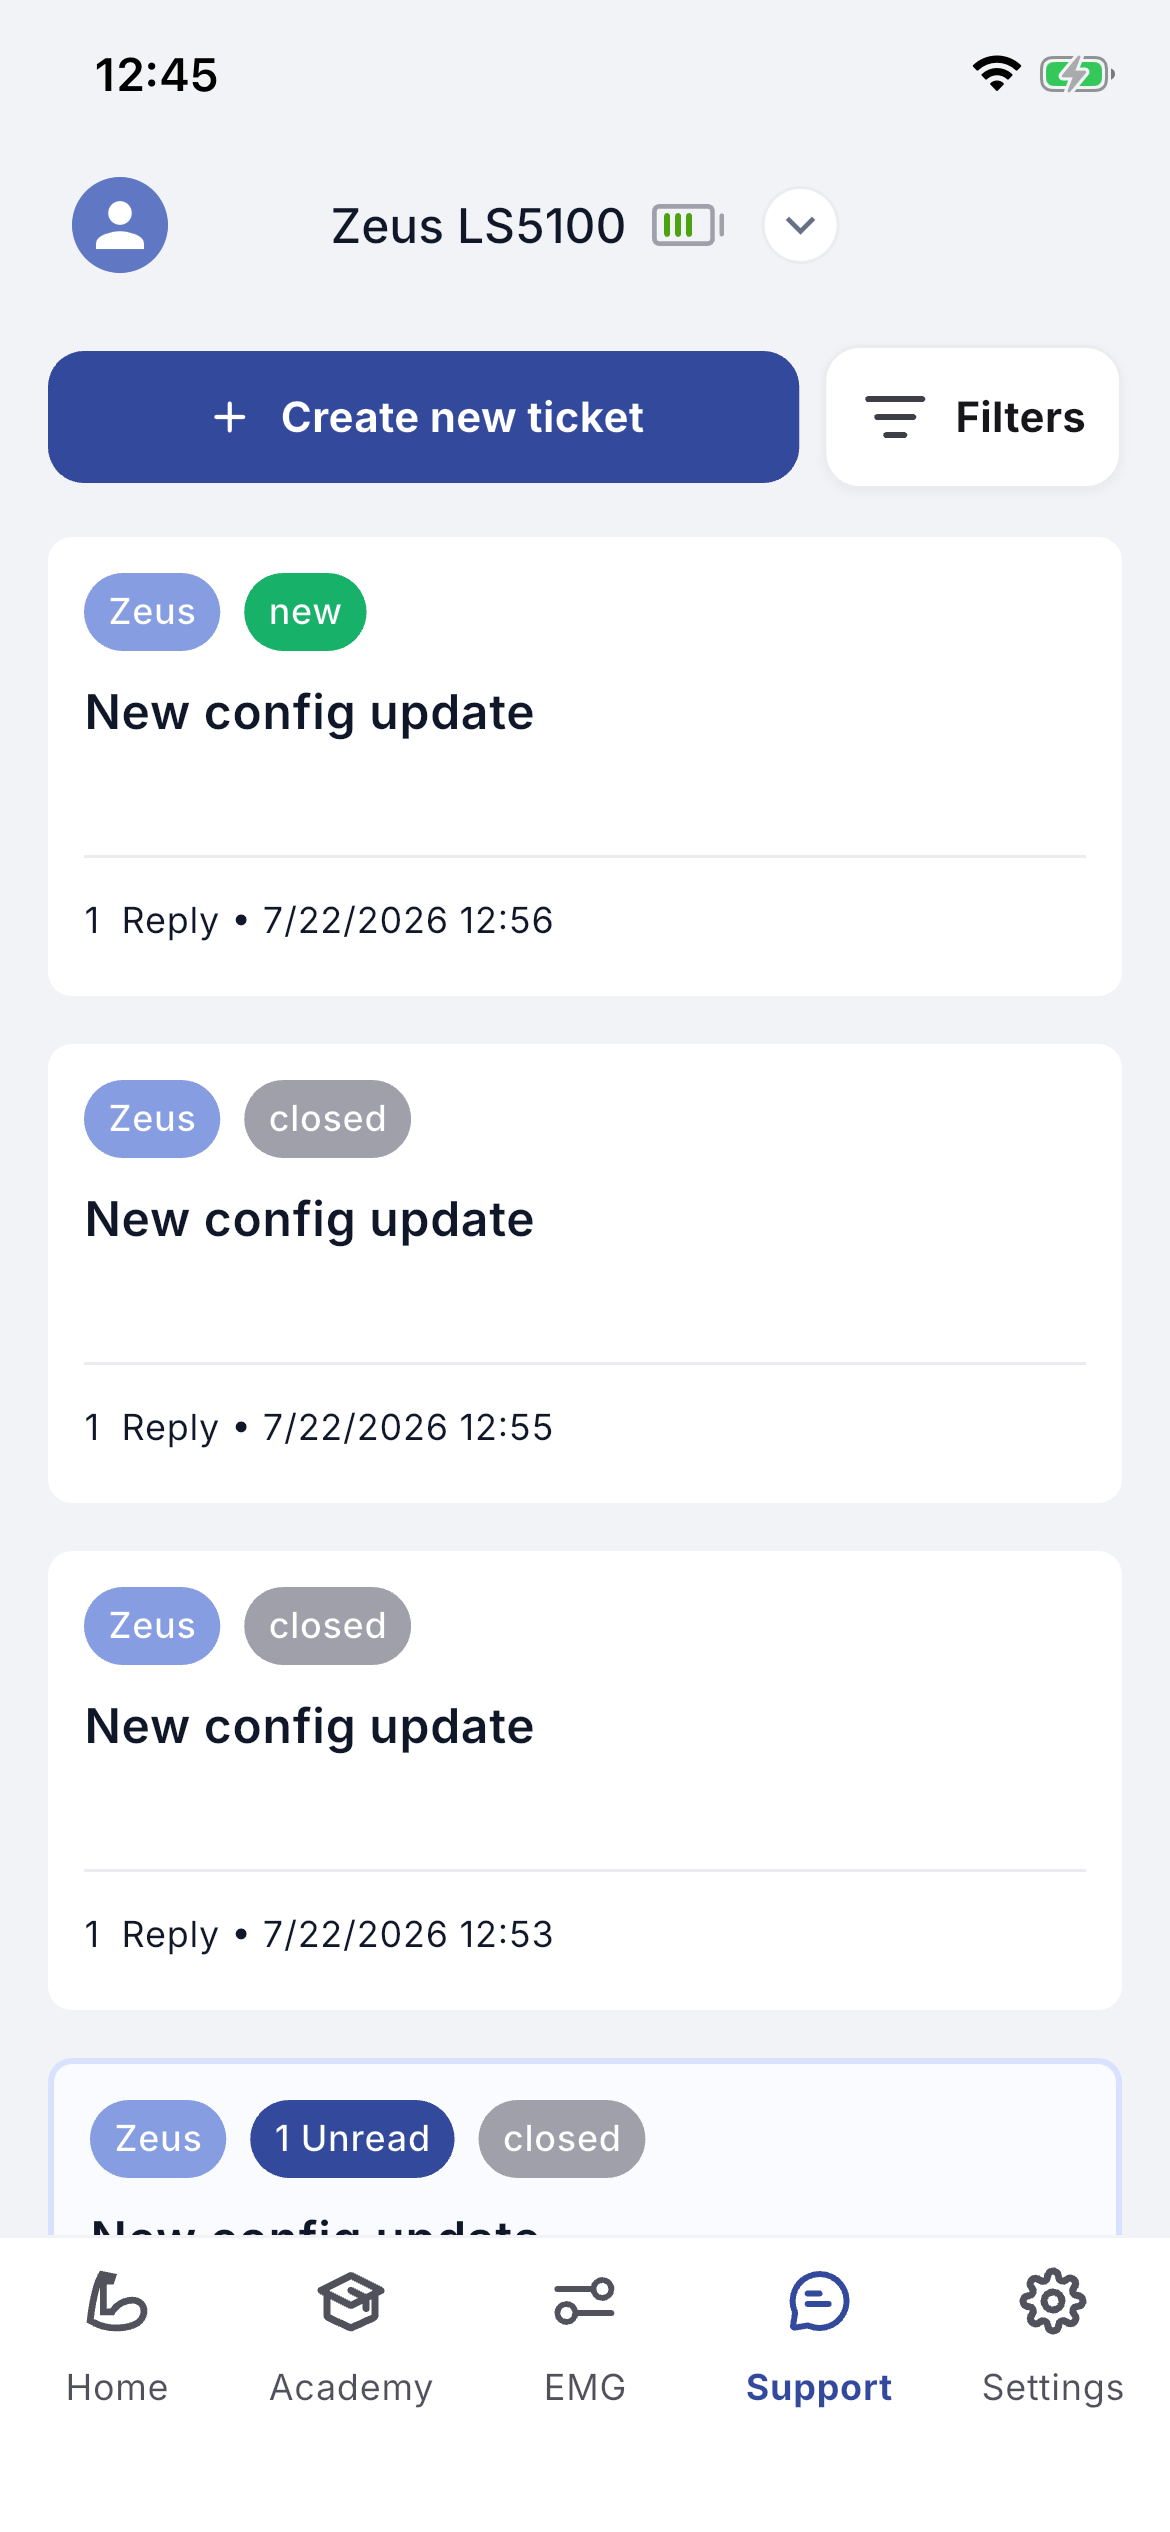
On this screen you can ask your clinician for support. Tap 'Create new Ticket' to send a message. You can also review the history of previous support messages and configuration updates.
In the description box, specify the request or problem, ideally describing what led to it, what is happening and your desired outcome. You can record a voice message via 'Add voice record (optional)': tap the microphone to start and 'Stop recording' to finish. To attach screenshots, pictures or videos use 'Add attachment' (.jpg, .png, .gif; no larger than 100 MB). Tap 'Send message' to submit; a pop-up confirms it was sent.
Settings
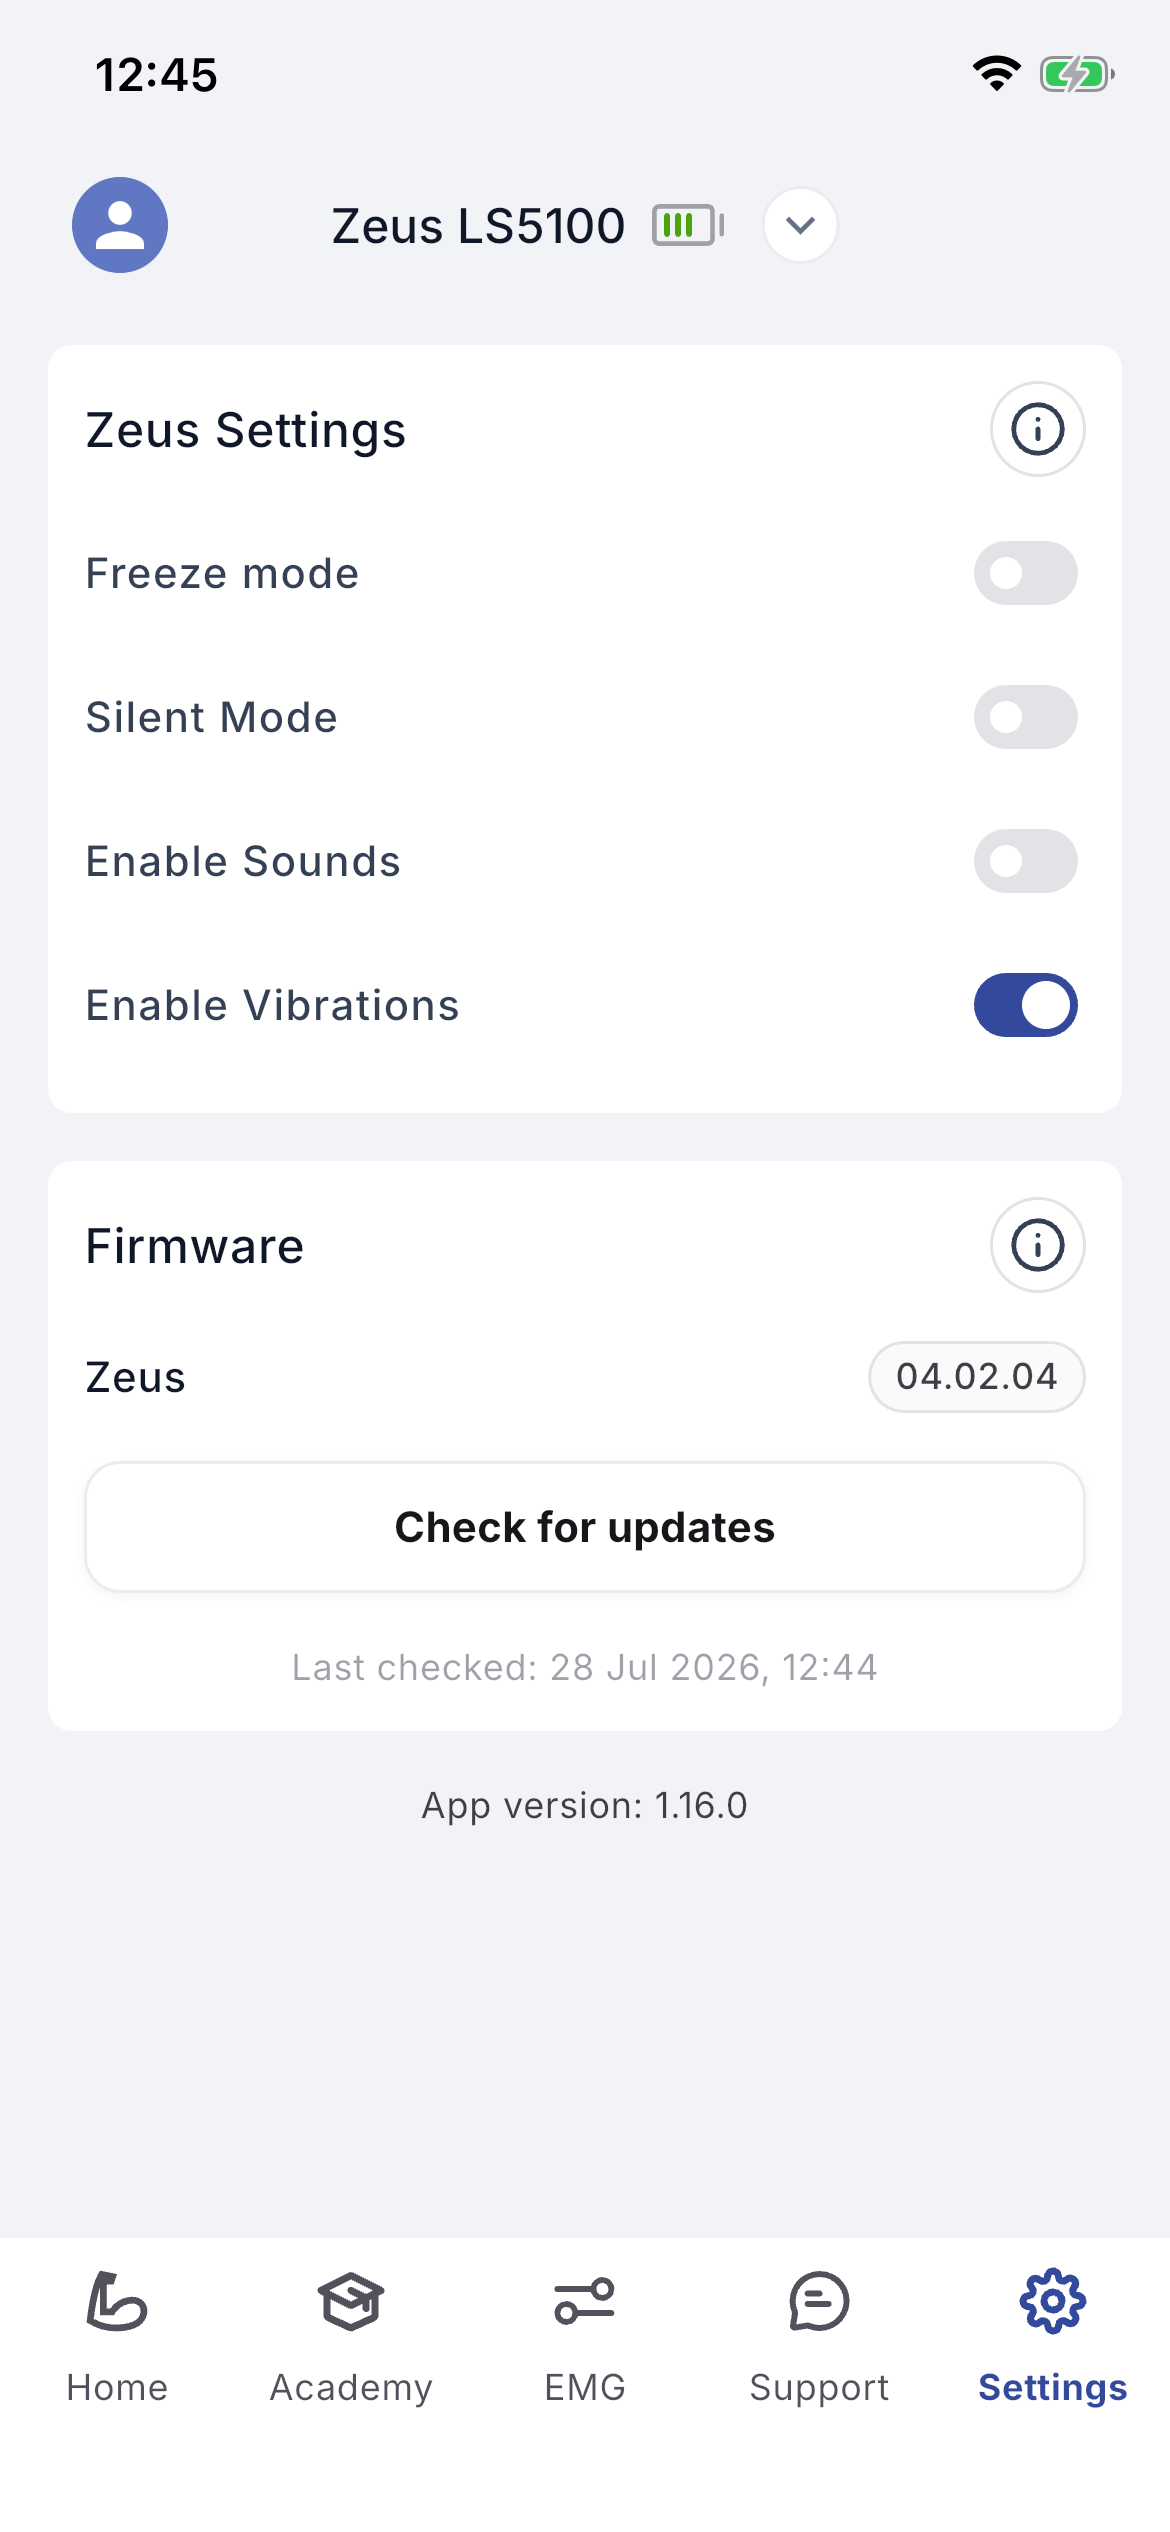
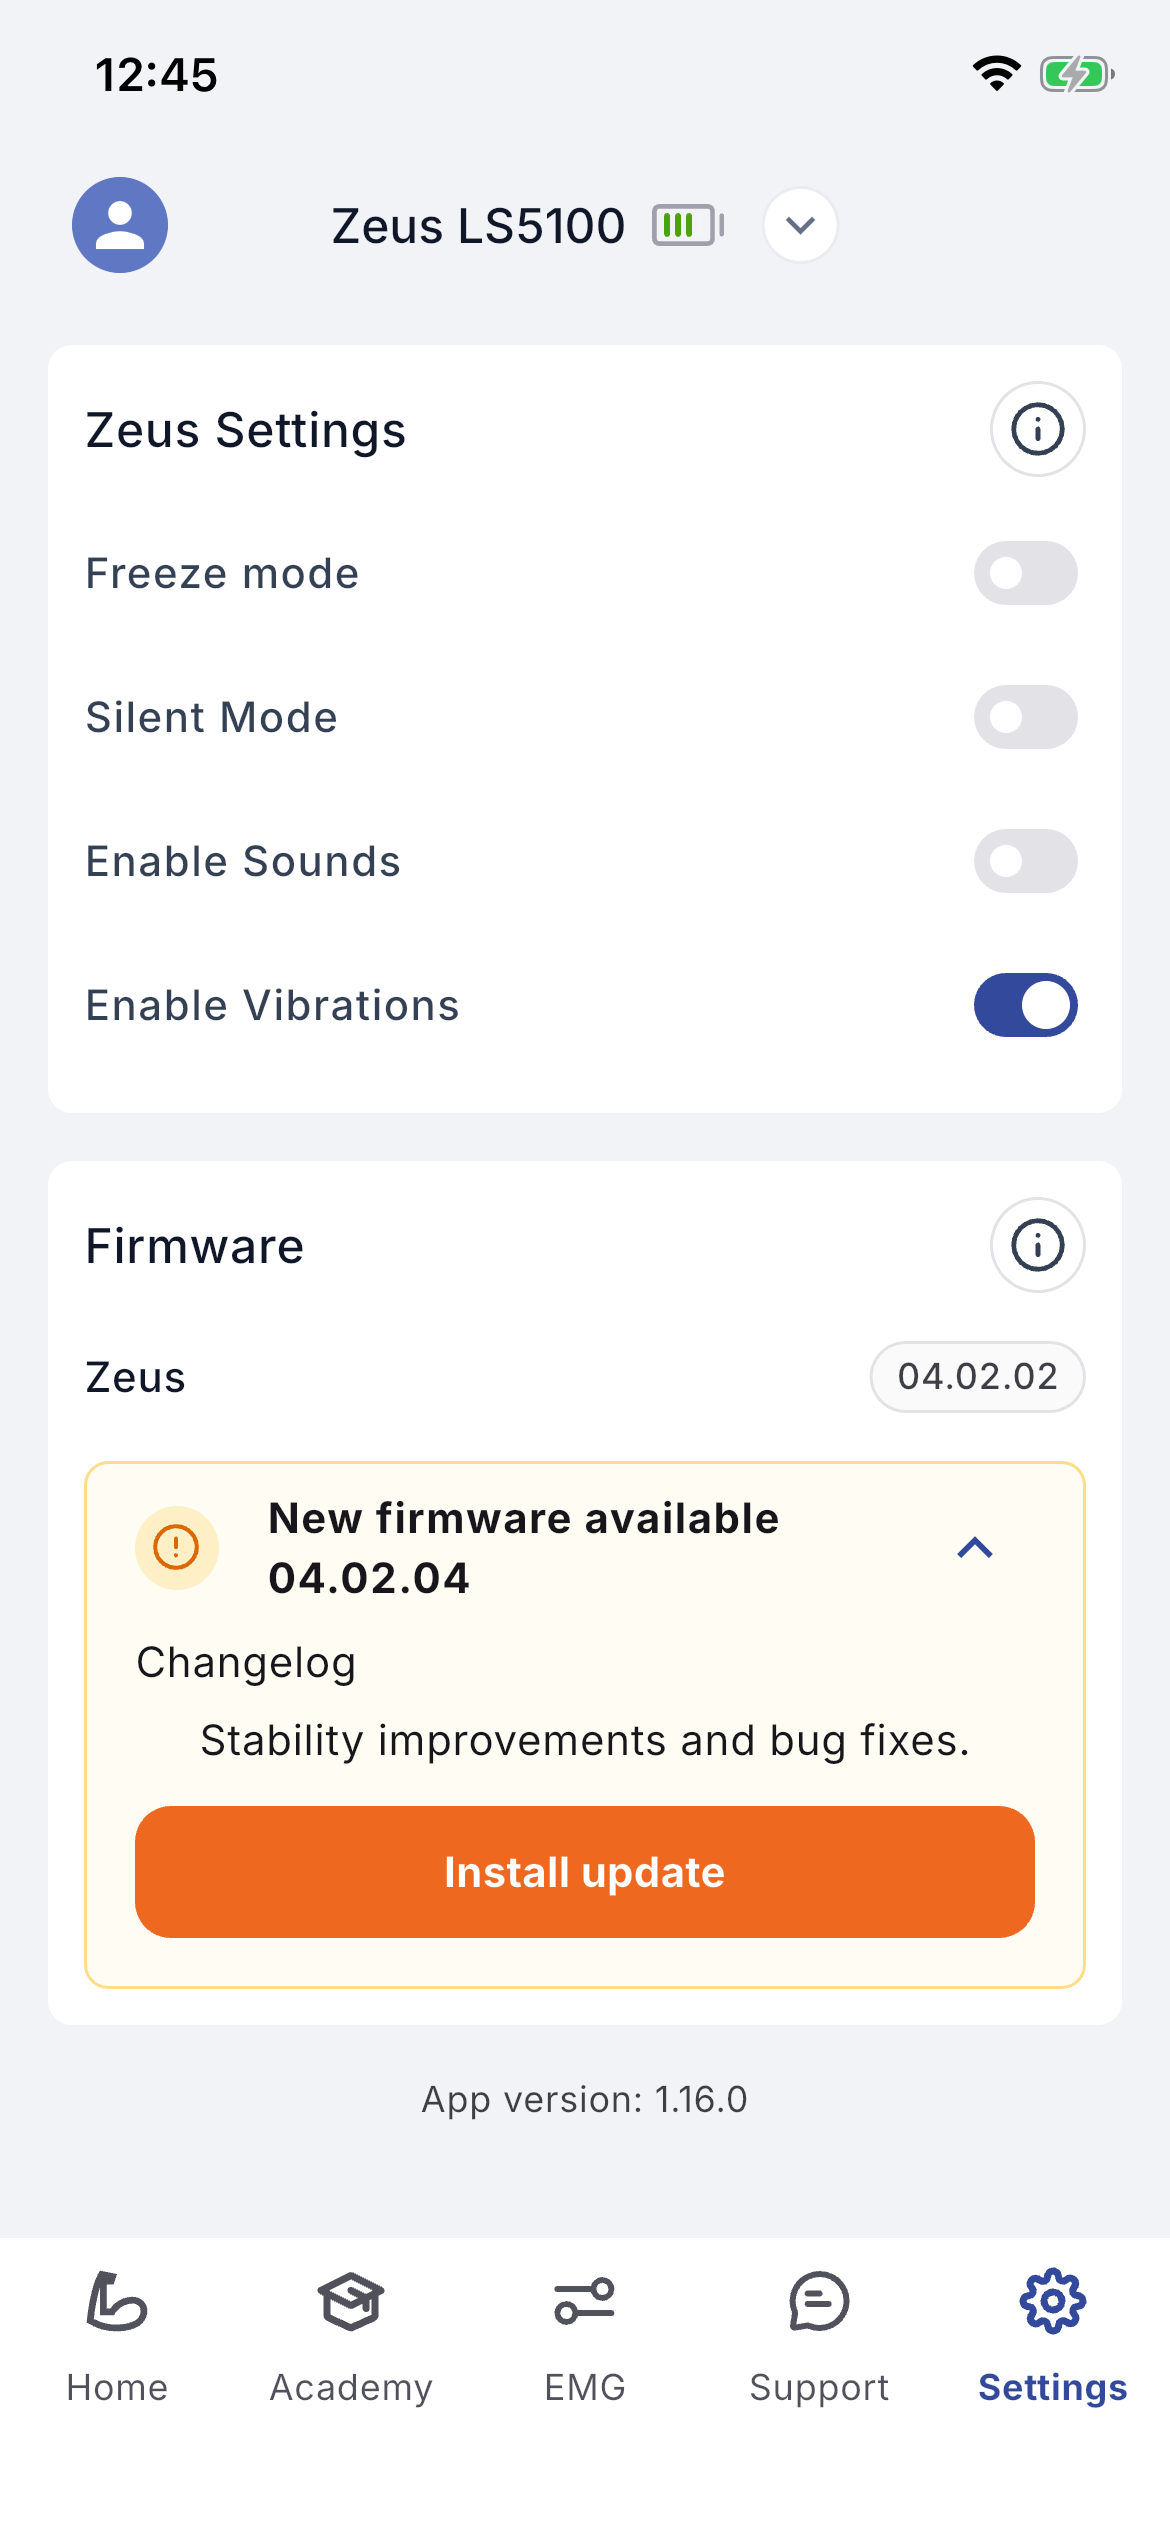
In Settings you can enable or disable Freeze Mode and Silent Mode and check for a new firmware update.
7.1 Device configuration
- –Freeze Mode (right = on, left = off) blocks the prosthesis from moving. It is useful for testing signals without draining the battery, causing distraction or risking damage to the device.
- –Silent Mode (right = on, left = off) turns off the device beeping and vibration; useful when you do not want to be disturbed, for example in a cinema.
7.2 Update your firmware
If a new Zeus hand firmware version is available you will see a summary of the changes. The battery level of both the Zeus hand and the phone must be at least 50% to start. The update may take a few minutes, during which you cannot use the Zeus hand. Keep the phone close to the hand until the update completes. Progress is shown; when finished the hand reboots and calibration begins, and a confirmation message is shown.
Warning Battery of the Zeus hand and the phone must be at least 50% before starting. The hand cannot be used during the update; keep the phone close to the hand until it completes.
Profile
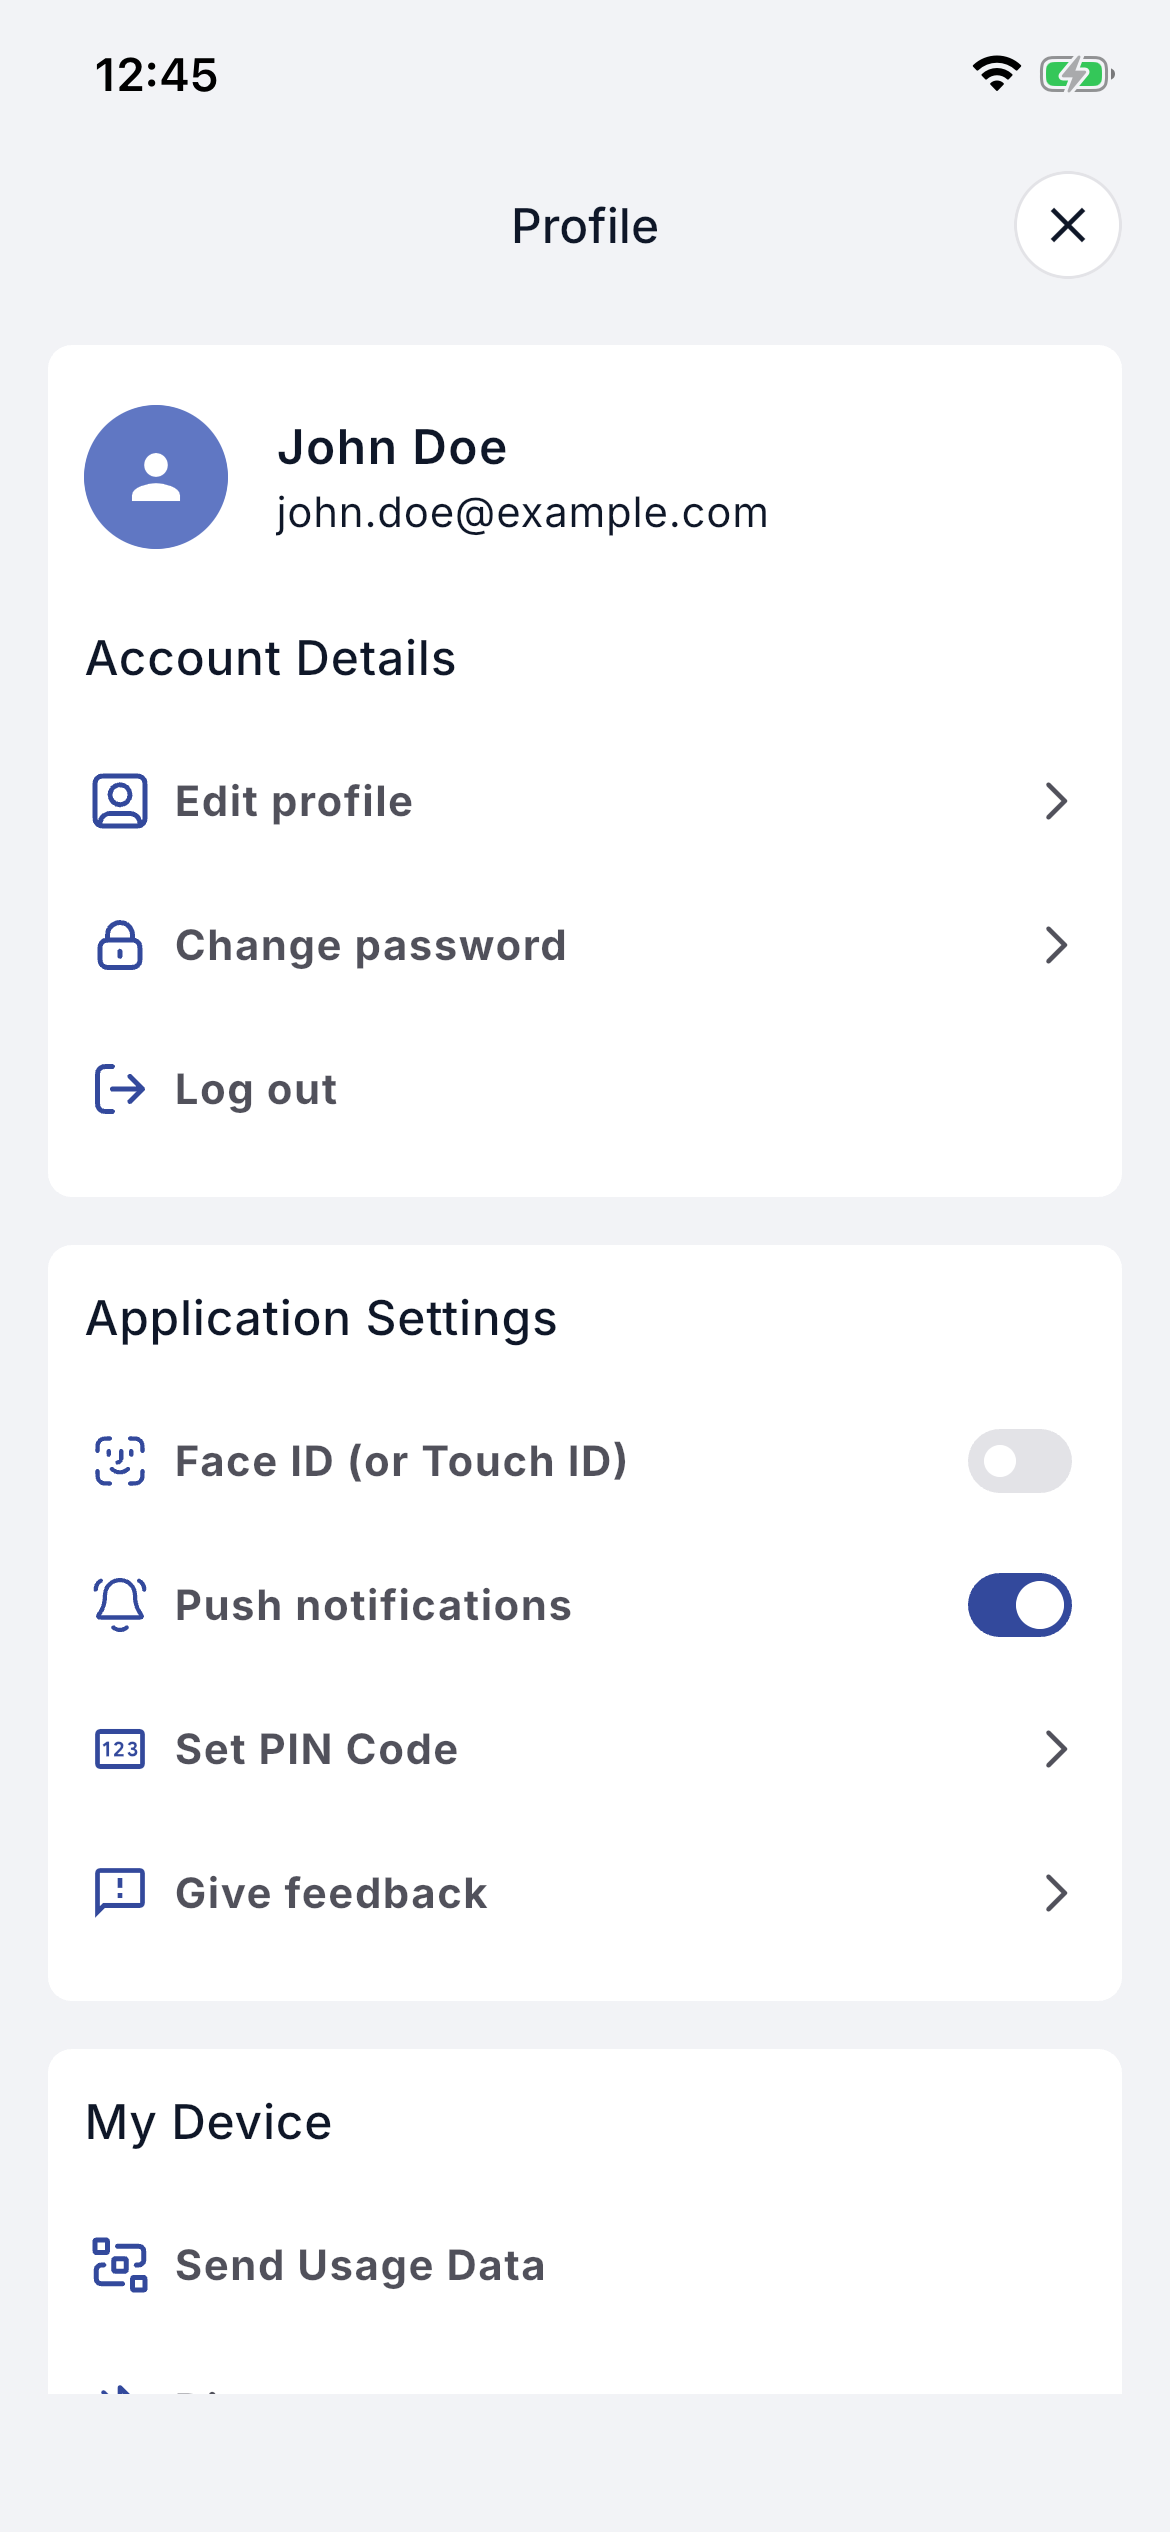
From Profile you can manage your account and application settings.
- –Account details: edit profile information; change the account password; log out.
- –Application settings: enable or disable fingerprint authentication; toggle push notifications.
- –My device: send usage data to the clinician.
- –Knowledge: access frequently asked questions; view the detailed instructions (this IFU) for the application.
Remote session with clinician
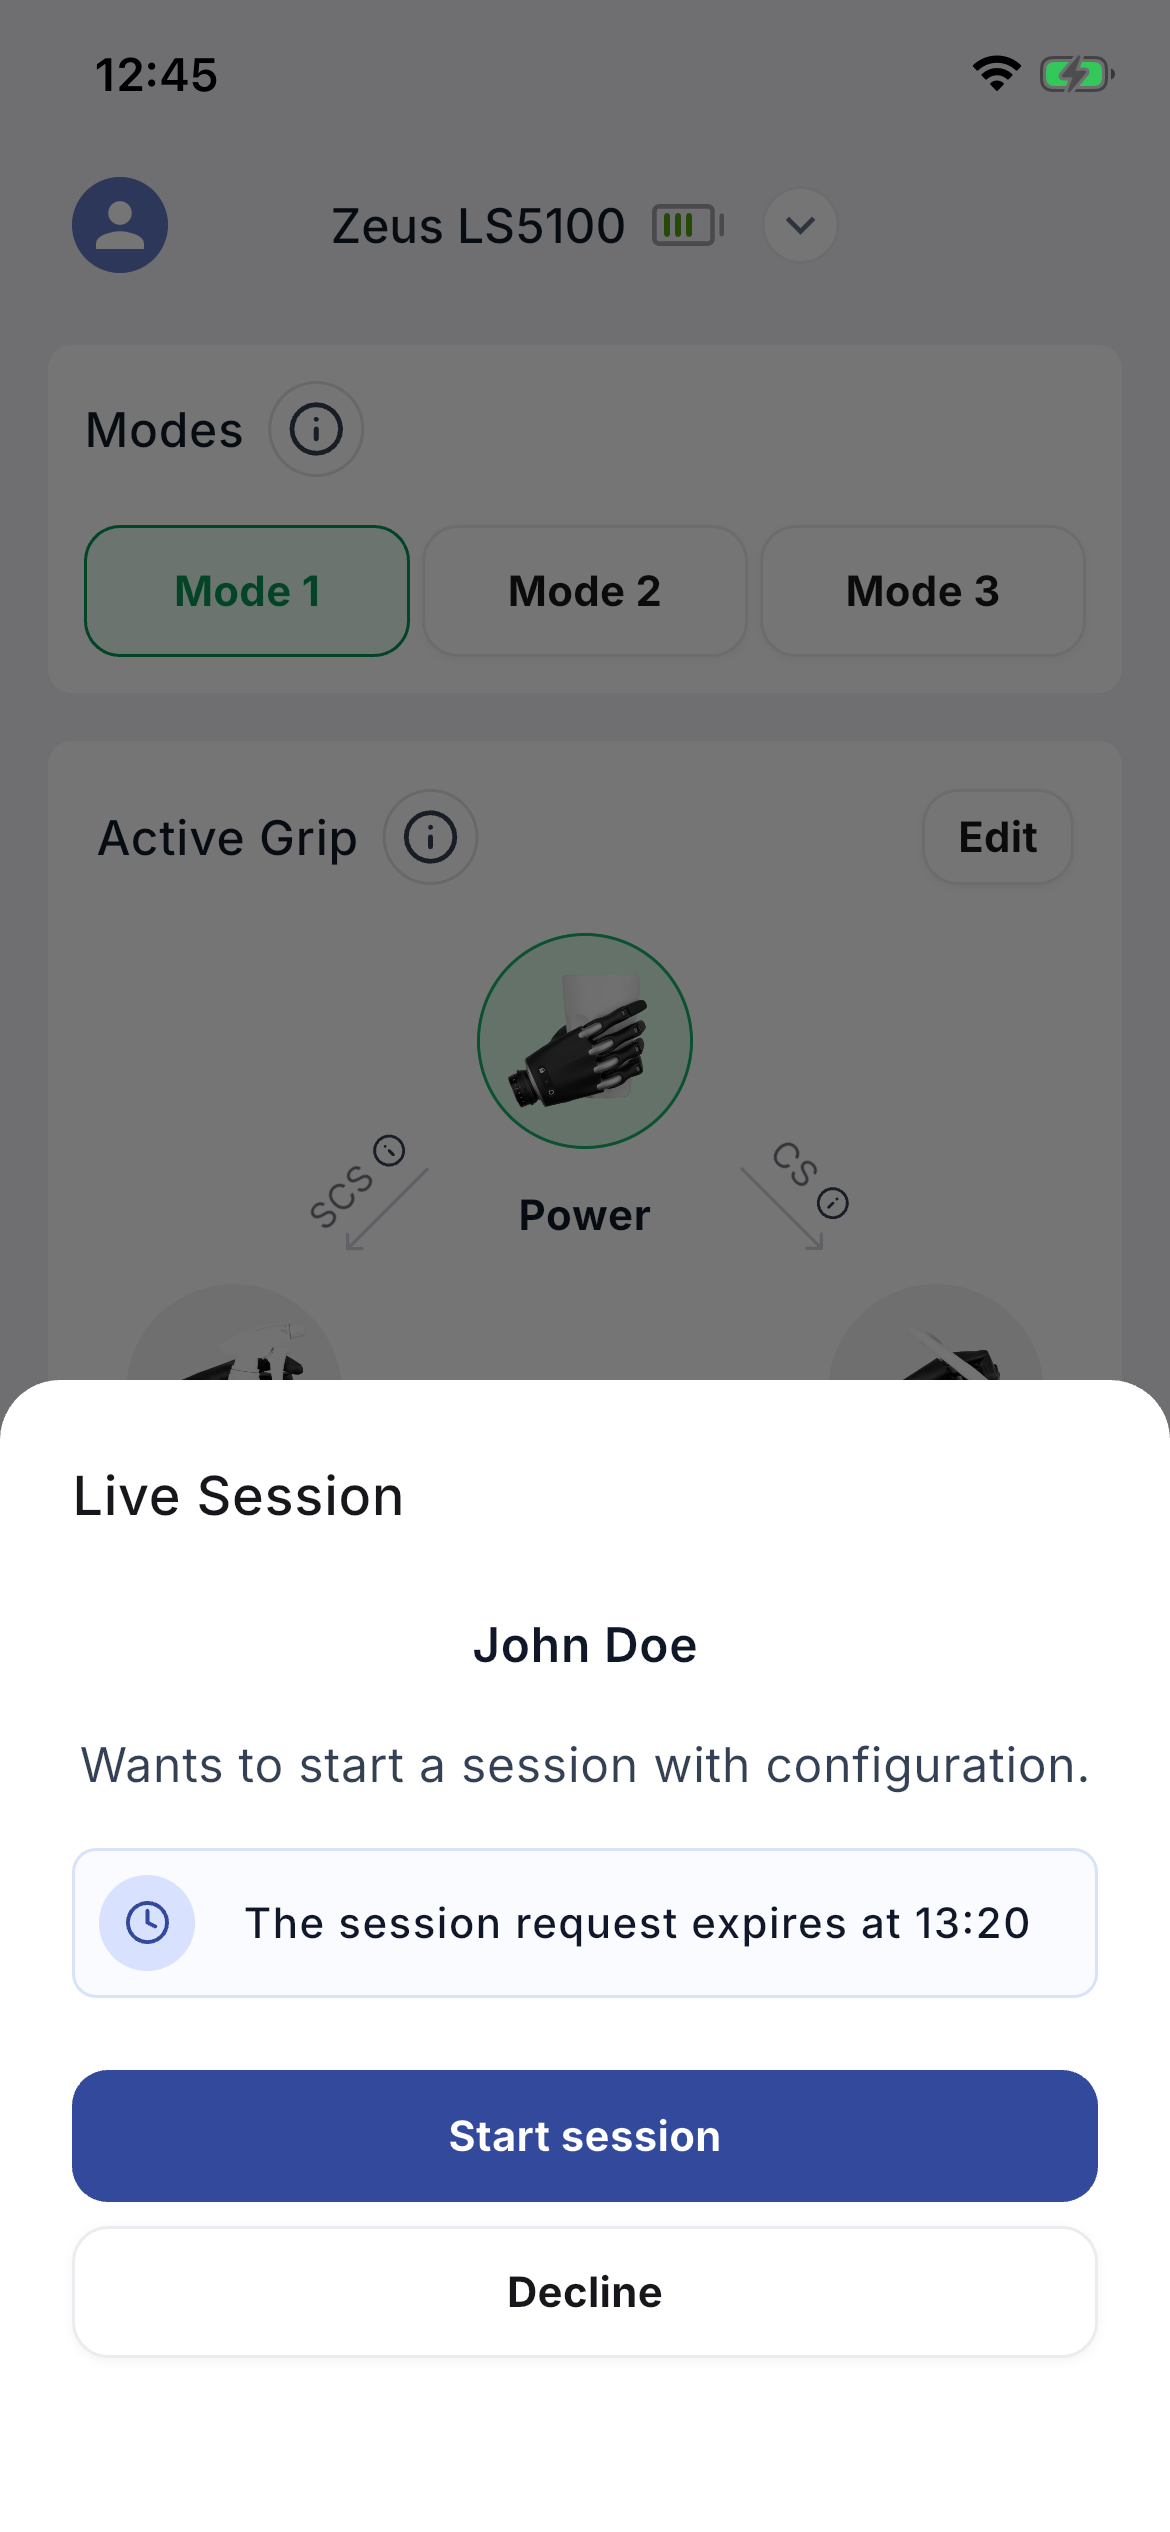
The clinician can create a session request that appears on your screen. Before the session starts, make sure the prosthesis is powered on and connected to the app, and check your internet connection. Accept or decline using the corresponding buttons; if no action is taken the request expires, with the expiry time shown in a grey box in the centre of the screen. During the session the clinician sees your EMG signals in real time and has access to all hand settings.
After the session starts, allow audio and video recording by tapping 'Allow' on the pop-ups. The controls at the bottom of the screen are: mute/unmute microphone; turn camera on/off; chat; settings; and disconnect.
When the session ends and a new configuration has been created, confirm it by tapping 'Save'; you are taken to the 'New hand configuration' screen. If you decline, the configuration is stored in a ticket.
Academy
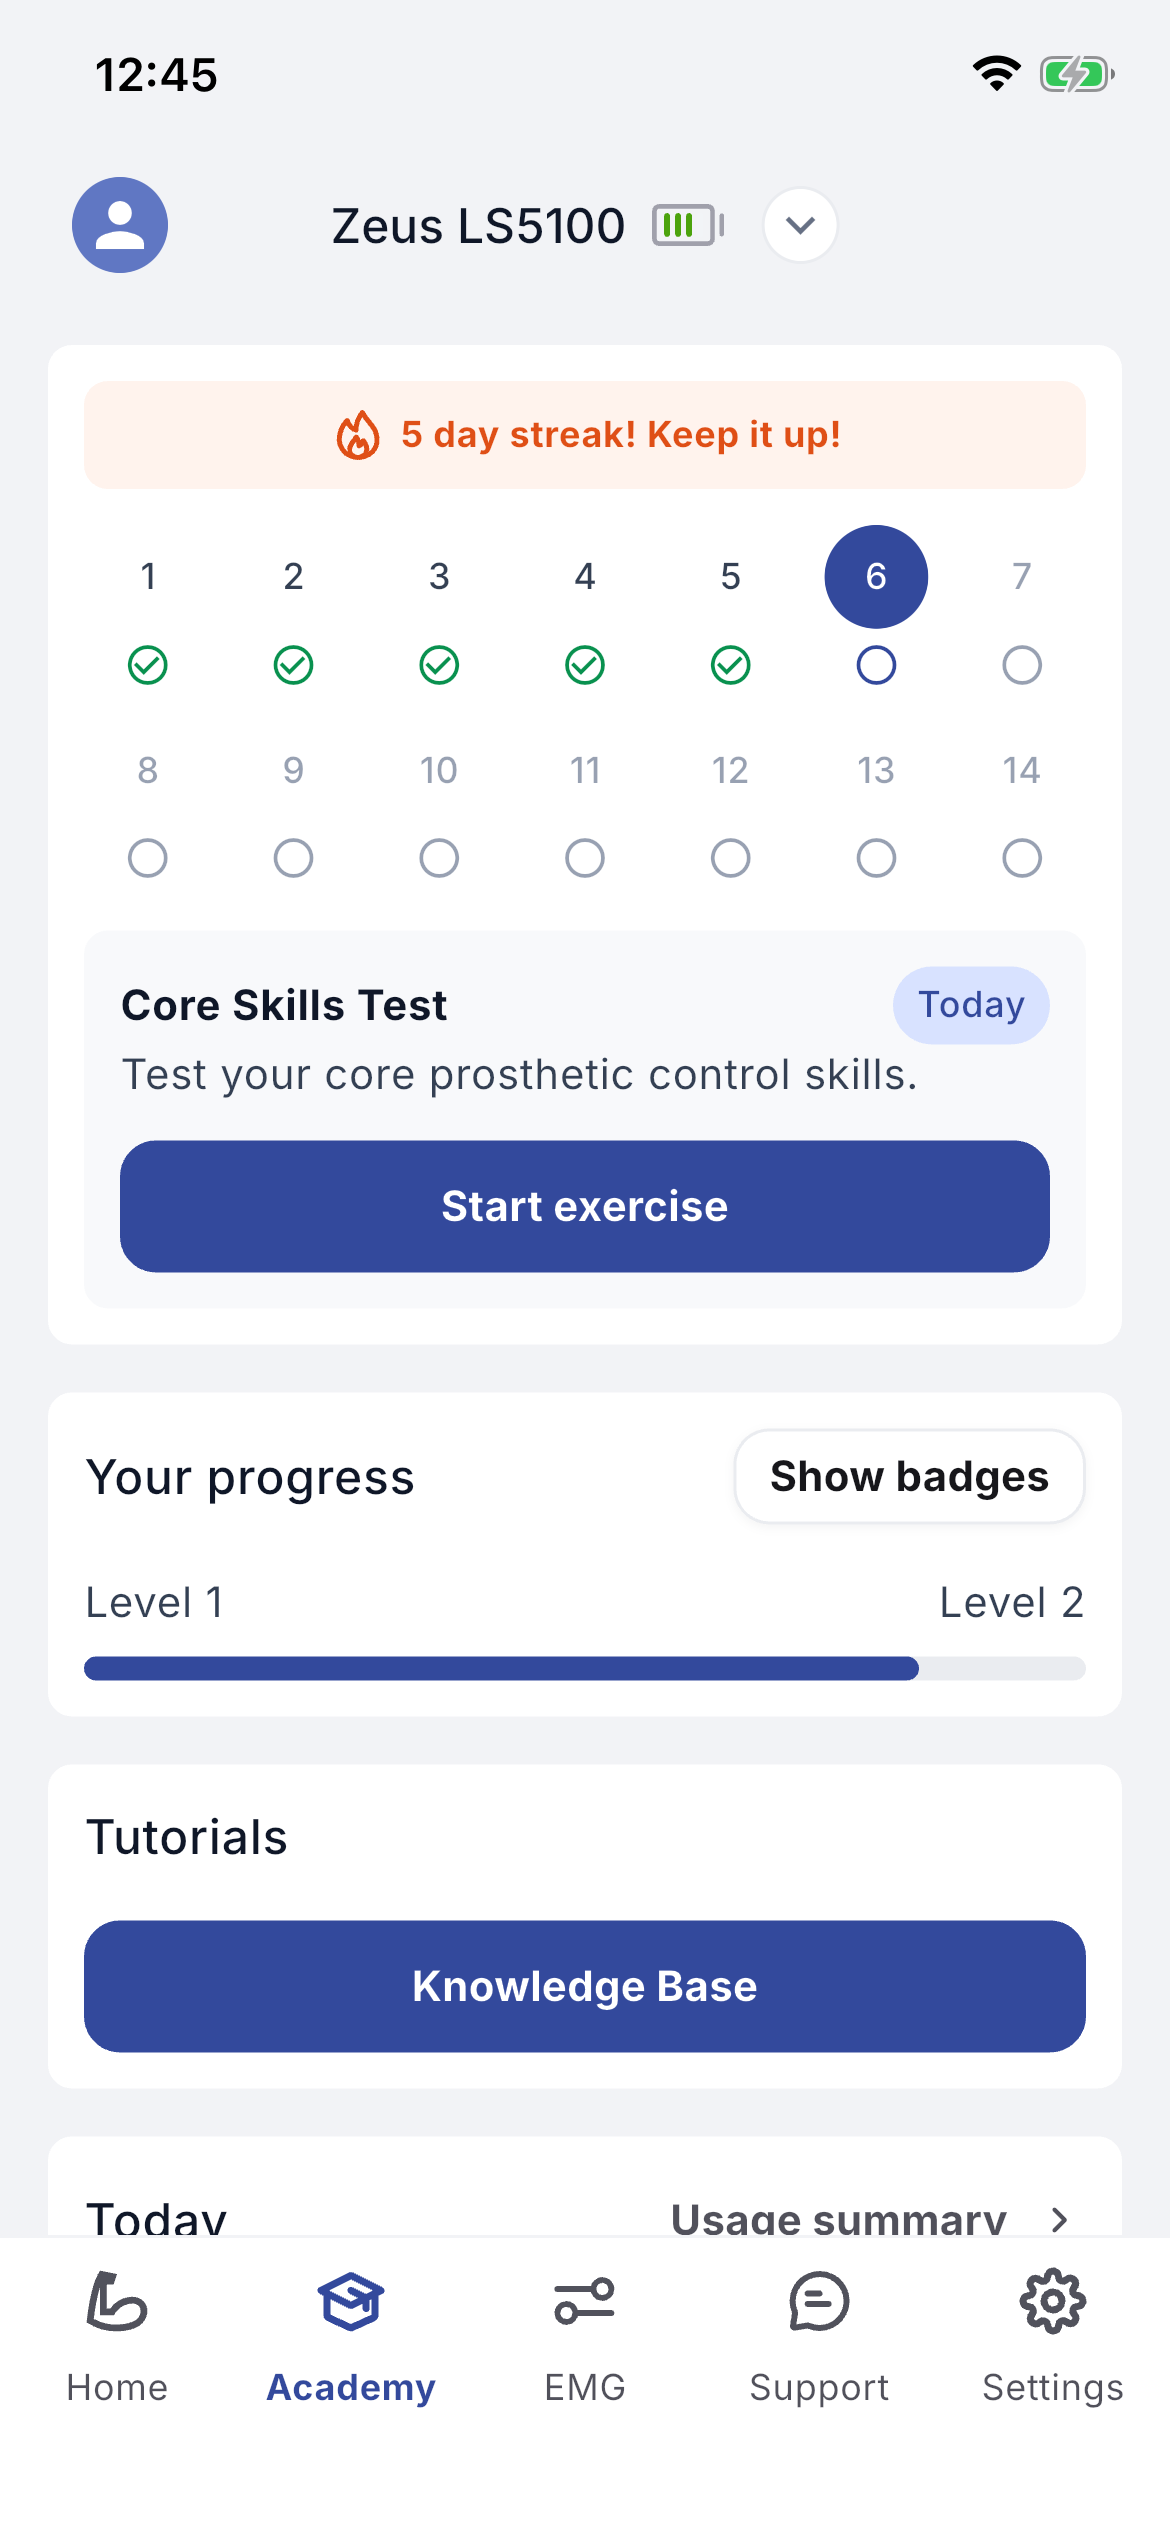
The Academy helps you learn to use your prosthesis effectively. It includes a step-by-step training programme for the first days of use. Each day has a short video, a training task and a simple quiz covering how the hand reacts, how EMG control works and how to use grips safely. The plan uses data from your hand and the app (grips, movements and EMG signals) to keep tasks achievable and track progress. Exercises take a few minutes a day; you can repeat previous exercises to practise specific skills. A Knowledge Base of short instructional videos is also provided, browsable by category.
Allied health professionals and clinicians can set goals and monitor progress for three activities: grips and switches (reported automatically to the platform when you connect the app to the hand) and exercises (which you report in the app). Clinicians can check progress for each goal and see any issue you report with an exercise.
If a clinician sets a goal for you, your statistics become the main view. You can see your grip and switch goals and which exercises to perform and how often. Tap the arrow next to grips or switches for details. Tap 'Action' to mark whether you completed an exercise, which lets the clinician track your progress. 'Daily' and 'Weekly' show exercises at the set frequency; 'Today's progress' shows today's statistics.
Troubleshooting
For questions, contact your clinician. For bugs or problems, email {{ supportEmail }}, specifying the question or problem, ideally what led to it, what is happening and your desired outcome. Screenshots can be attached to speed up resolution.
11.1 Removing the software
You can delete the app from your phone and reinstall it later if you change your mind.
- 1Open the Google Play Store app.
- 2At the top right, tap the profile icon.
- 3Tap 'Manage apps & devices'.
- 4Go to the 'Manage' tab.
- 5Tap the name of the app to delete.
- 6Tap 'Uninstall'.
- –From the Home screen: touch and hold the app, tap 'Remove App', then 'Remove from Home Screen' to keep it in the app library, or 'Delete App' to remove it from the iPhone.
- –From the app library: touch and hold the app, tap 'Remove App', then 'Delete App'.
11.2 Tickets FAQ
I changed the device during a remote session but accidentally declined the changes at the end. What happens?
The device configuration reverts to the last one used, but the changes are not lost: after the session a ticket containing all the changes is sent to you, so you can install them later. Only the last sent ticket with changes can be used; earlier ones are closed but remain visible in the inbox.
What happens when I accept changes sent in a ticket?
The changes are installed to the device and saved in the database.
I installed the configuration the clinician sent but I do not like it. What can I do?
Use the 'Restore previous' button in the same ticket to return to the last used configuration. You can also ask your clinician to restore any other previous configuration.
Does a ticket sent after a remote session work the same as one sent during asynchronous configuration?
Yes. The only difference is that after a remote session you can install changes immediately without going to the inbox.
Can I go back to any previous configuration myself?
No. As a patient you can only return to the last used configuration using 'Restore previous' in the ticket. Clinicians can restore to any point in the device history.
The application does not install or update properly. What can I do?
Make sure the phone has enough free storage. If the problem persists, download the application again and turn your device off and on.
I cannot see the Bluetooth ID.
Log out of the app and log in again.
Security
Operate the application from a secure device. Close the application when you are not using it or are away from the device. Never share the password to your Aether Digital Platform account.
Compatibility
The Aether Digital Platform Mobile supports Zeus V1 and Zeus V2 hands, and Aether MyoSense electrodes. Compatible models:
Reporting
Any serious incident that has occurred in relation to the device should be reported to Aether Biomedical Sp. z o.o. via {{ complaintsEmail }} and to the competent regulatory authority of the country in which you are resident.
Other information
- –Aether Biomedical declares that it meets the appropriate European standards for the design, manufacture and supply of prosthetic products and user software under the CE mark. Continued compliance is monitored by internal and external audits.
- –All individual products are marked to indicate compliance with Medical Device Regulation 2017/745.
Symbols


Aether Biomedical Sp. z o.o.
ul. Mostowa 11, 61-854 Poznań, Poland.
Phone
Poland +48 780011548
USA +1 4708238221
India +91 9650488846
© Aether Biomedical. All rights reserved.